Flash Sale 70% Off
Give customers details about the banner image(s) or content on the template.
Are You One of Our Winners?

If you've ever tried to blow-dry your curls only to end up with a halo of frizz, you know the struggle all too well. That direct, concentrated jet of hot air is the enemy of natural texture. It blasts delicate curl clumps apart, roughs up the hair cuticle, and leads straight to that dreaded pouf. This is exactly the problem a hair diffuser was designed to solve.
Using a hair diffuser is the secret to gently drying curly or wavy hair, helping you form defined, frizz-free curls while seriously boosting volume. This attachment works by dispersing your blow dryer's airflow, which means no more harsh gusts disrupting your curl pattern. Honestly, it's the single best tool for embracing and enhancing your natural texture.
A diffuser is so much more than just a funny-looking attachment; it's a total game-changer for anyone with waves, curls, or coils. By spreading the airflow over a much wider area, it essentially mimics the gentleness of air-drying but gets the job done way faster. This simple shift in airflow is what allows you to get salon-quality results right at home.
The benefits are pretty clear, and you'll notice them right away:
A great diffusing routine isn't just about the tool itself—it's about the magic that happens when proper technique meets high-quality products. Pairing your diffuser with the right prep and finishing steps is what takes a good hair day and makes it truly great.
In this guide, we're going to walk you through every single step, from prepping your hair with the perfect Morfose products to mastering the drying techniques that will change your hair game. Get ready to unlock the secret to gorgeous, healthy, and beautifully defined curls.
A stunning, frizz-free finish doesn't just happen when you turn on the hair dryer. The real secret to learning how to use a hair diffuser like a pro is understanding that the prep work is everything. It all starts in the shower.
Think of it like priming a canvas before painting. Without a smooth, well-prepared base, your final masterpiece will never quite live up to its potential. Curls thrive on hydration, and diffusing can easily amplify dryness if you start with thirsty hair. That’s why your wash and conditioning routine isn't just a step—it's the foundation.
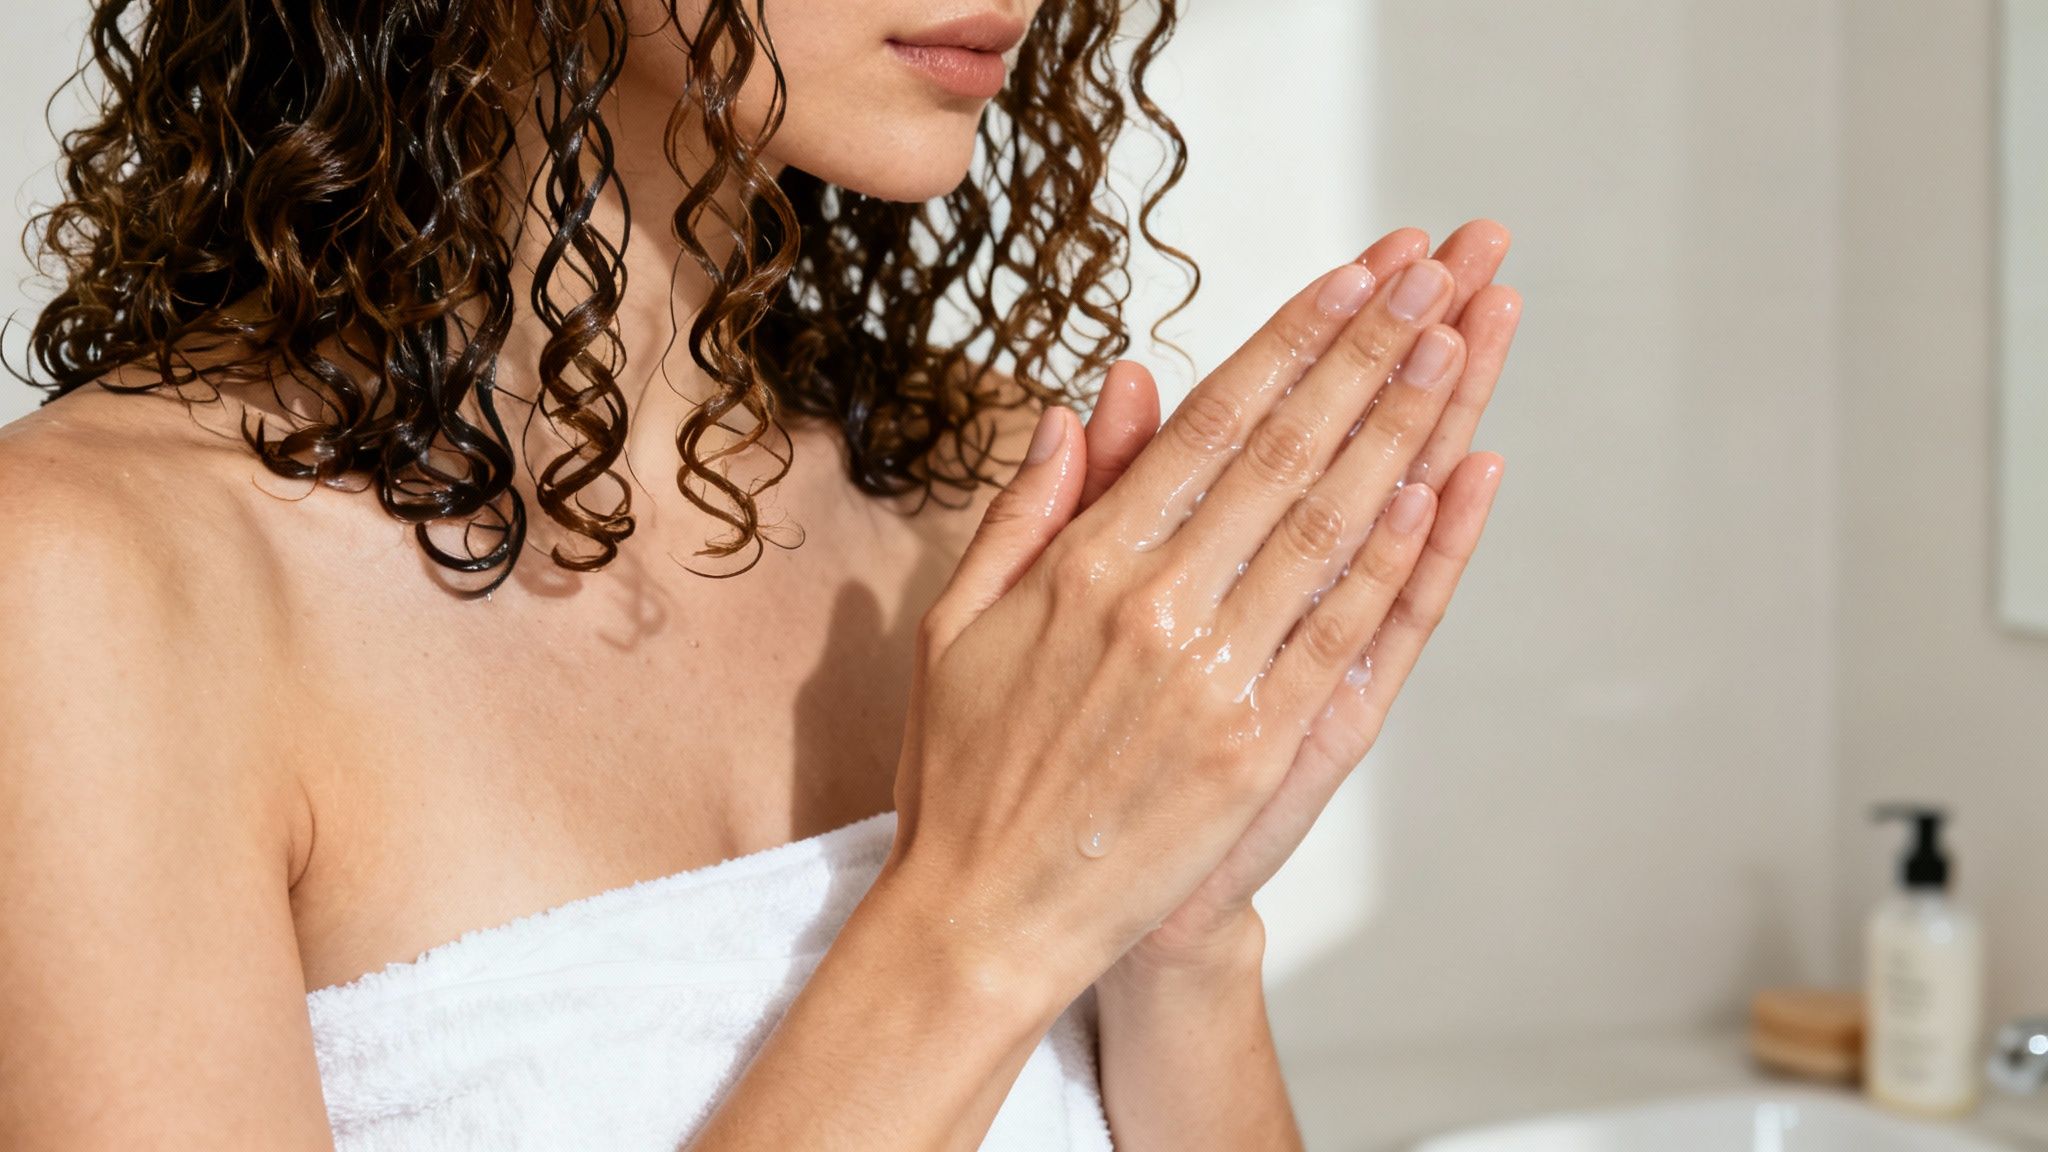
One of the biggest mistakes people make is towel-drying their hair too much before applying products. For curls to clump together into those beautiful, defined ringlets we all crave, they need to be styled while they're soaking wet. I'm talking fresh-out-of-the-shower, still-dripping wet.
This allows your styling products to glide right through your strands, coating each curl evenly without creating friction or frizz. When you try to put product on damp or semi-dry hair, you're fighting an uphill battle, trying to reshape curls that have already started to go their own way. That’s a recipe for a frizzy, undefined mess.
So, ditch that rough terrycloth towel. Instead, gently scrunch out the excess water with a microfiber towel or even a soft cotton t-shirt. This absorbs just enough moisture to stop the dripping but leaves your delicate curl pattern perfectly intact.
Applying your products is an art, and believe me, the order matters. Layering them strategically is how you give your curls everything they need—moisture, definition, and hold—without weighing them down.
First up, a lightweight leave-in conditioner. This provides a baseline of hydration and makes detangling so much easier. This initial step preps your hair to absorb the styling products that come next.
Now, it's time to build your curl structure with a curl cream or mousse. These products are designed to encourage your natural pattern and give it that initial shape and bounce.
Finally, you need to lock it all in. A gel or a strong-hold mousse is your last layer. This creates what we call a "cast"—that slightly crunchy coating that protects your curls from frizz while they dry. Don't worry, you'll scrunch it out later for soft, touchable results.
How you apply your products can make or break your final look. Raking products through your hair can pull apart those precious curl clumps, so try one of these stylist-approved methods instead:
Key Takeaway: Always, always apply your styling products to soaking wet hair. This one small change is probably the most impactful thing you can do to slash frizz and get incredible curl definition with your diffuser.
Before a single bit of heat touches your hair, you need a heat protectant. This isn't optional; it's mandatory. While diffusing uses lower heat than a traditional blow-dry, it's still heat. Over time, that exposure adds up, leading to dryness, brittleness, and damage.
A good heat protectant creates a shield between your hair and the dryer, protecting the cuticle and sealing in moisture. Look for a lightweight spray that won't make your curls feel heavy or greasy. Mist it all over your hair after you’ve applied your stylers, making it the very last thing you do before you start to diffuse. Your curls will thank you for it.
Knowing how to use a hair diffuser is only half the battle. Honestly, the products you use before you even think about picking up the dryer are just as important for getting those gorgeous, defined curls. Your technique and your toolkit have to be in sync.
Building the right product routine is all about making sure your hair is hydrated, protected, and ready for styling success. A great diffusing session starts with a solid foundation of moisture and ends with that perfect, touchable shine. We’ve put together a simple but incredibly effective routine using some Morfose must-haves to prep, style, and finish your look perfectly.
Think of applying your products like layering clothes for the perfect outfit. Each product has a job to do, and putting them on in the right order makes a world of difference. This way, your curls get exactly what they need, right when they need it.
First things first, you need a lightweight leave-in conditioner to set the stage. After you’ve gently scrunched the dripping water out of your hair, you need something that adds moisture without dragging your curls down.
A few spritzes of a leave-in treatment will instantly help you work through any tangles, smooth down the hair cuticle, and give your hair that first crucial layer of hydration. This little step makes your hair so much more cooperative for the styling products coming next.
Alright, now it’s time to build that gorgeous definition and hold. For bouncy curls that actually last all day, you need a product that encourages your natural pattern to pop.
A quality hair mousse is fantastic for creating soft, touchable definition without that crunchy, stiff feeling we all hate. Try applying it with the "praying hands" method or by "squishing to condish" on soaking wet hair to help those perfect curl clumps form.
Before you even think about plugging in that diffuser, a heat protectant is completely non-negotiable. It’s your hair's personal bodyguard, shielding it from potential damage and making sure your diffusing routine is healthy in the long run.
A heat shield spray should be the very last thing you apply before the heat hits. Mist it all over your hair to create a protective barrier that seals in all that good moisture and guards against the dryer's heat. It’s a simple step that is absolutely vital for keeping your hair healthy.
Pro Tip: Don't just spray the top layer of your hair! Gently lift up sections and spray underneath, too. You want to make sure every single strand is protected from root to tip.
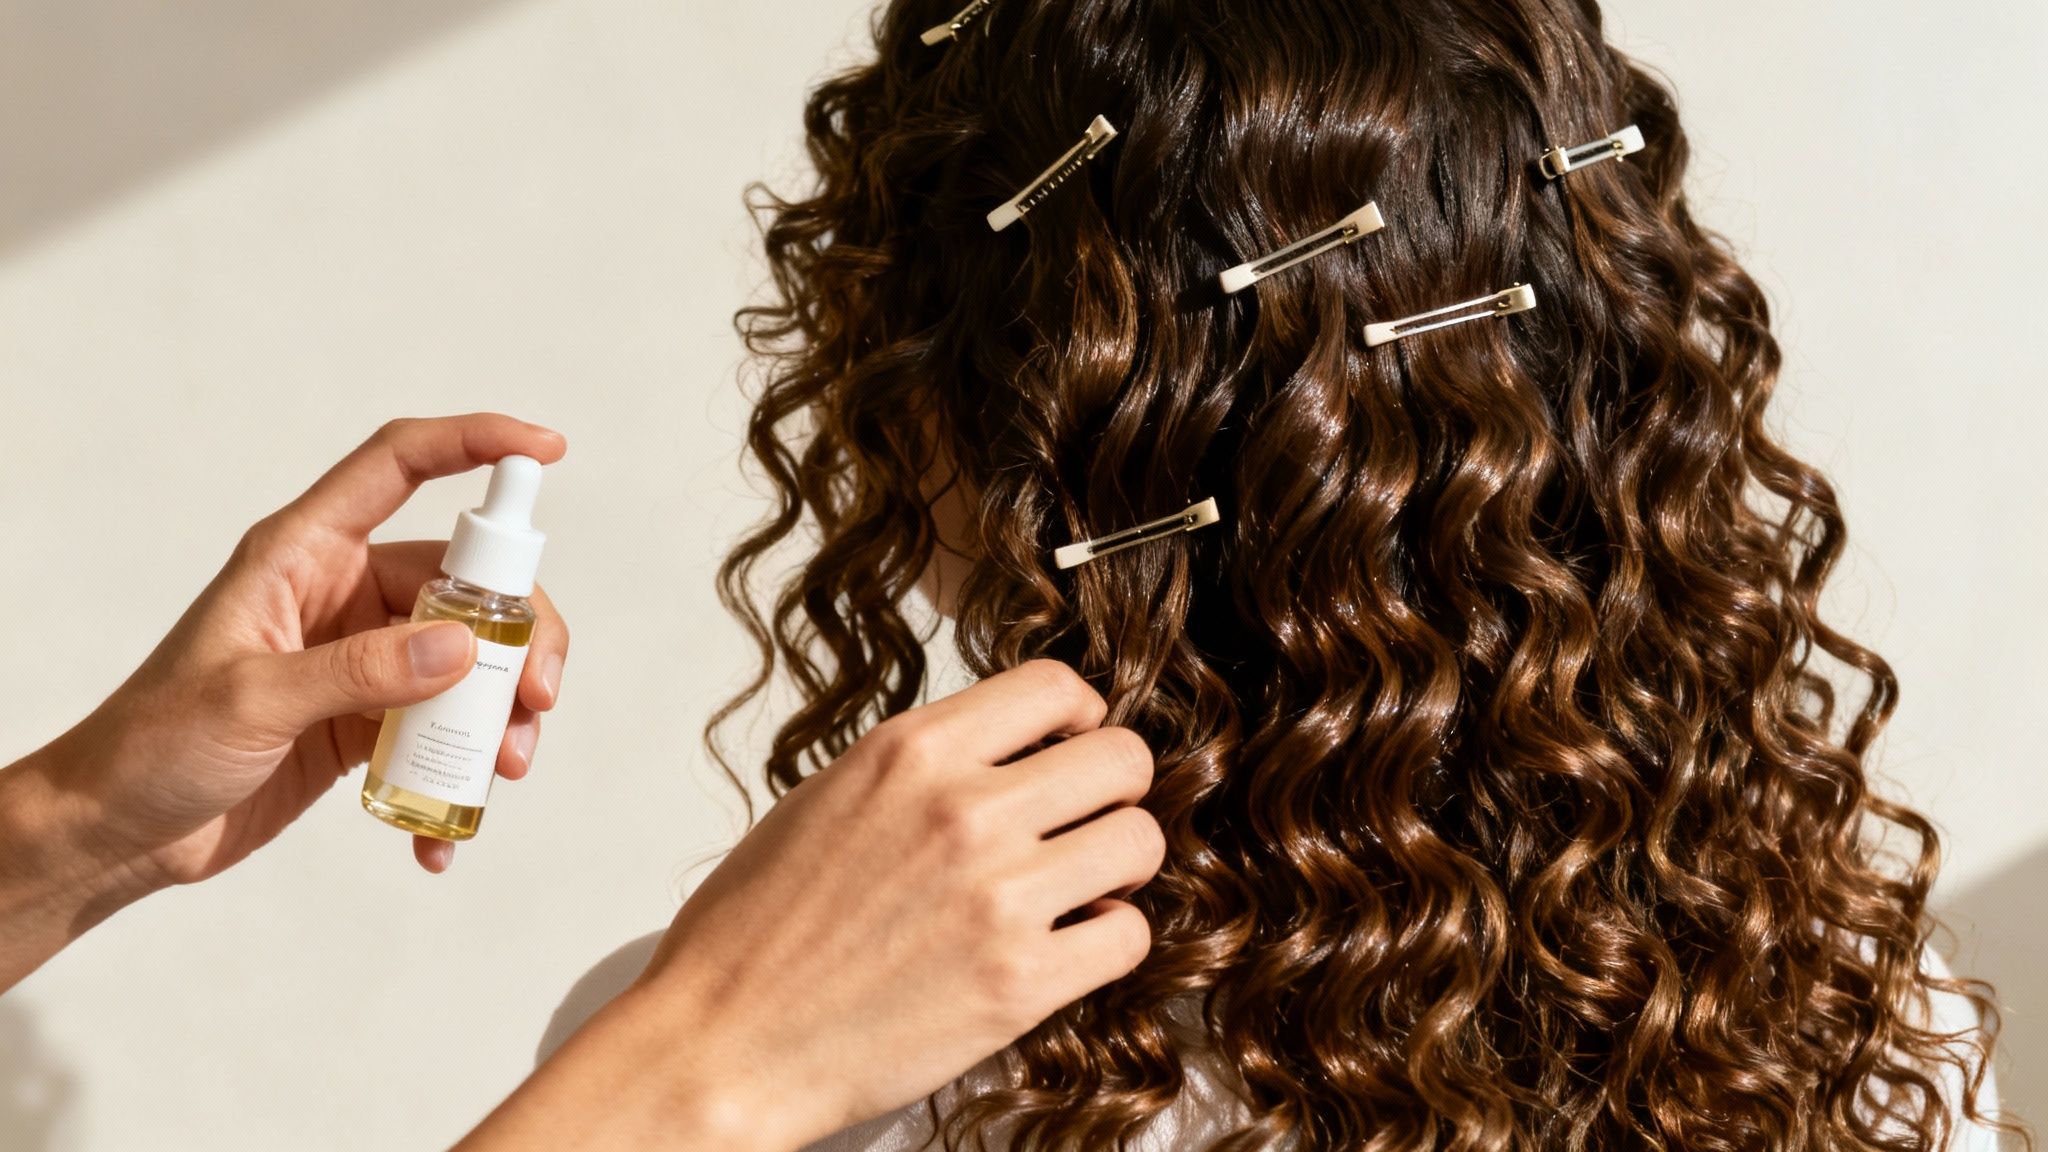
Once your hair is about 80-90% dry, it’s time for the magic touch that brings it all together. When you diffuse with a mousse or gel, you’ll often feel a "cast" form—that slightly firm coating that holds your curl shape as it dries. Now, we’re going to gently break it.
For this final step, a lightweight hair serum is your secret weapon. Put a few drops into your palms, rub them together, and gently scrunch your curls upwards. You’ll literally "scrunch out the crunch," releasing the soft, defined curls hiding underneath. The serum is also brilliant for taming any last-minute flyaways, adding a beautiful shine, and sealing your ends. It's the perfect finishing touch for a polished, soft, and frizz-free style.
And if you're always on the hunt for ways to keep your hair smooth and manageable, check out our guide on the benefits of a Morfose Keratin Leave-In Conditioner for all hair types.
Okay, your hair is prepped and ready to go. Now for the fun part—the actual techniques that will give you those incredible, salon-worthy results. Learning how to use a hair diffuser isn't about following a strict, one-size-fits-all manual. It’s more about understanding the why behind different methods so you can get the exact look you want. Your technique is what separates a pretty good hair day from a truly amazing one.
Let's move past the basics. We're going to dive into the specific, actionable methods that stylists use to create massive volume, defined curls, and that elusive frizz-free finish. Once you nail these, you can mix and match to build a routine that's perfect for your hair goals.
Two main techniques are the foundation of virtually every diffusing routine: Pixie Diffusing and Hover Diffusing. They each do something very different, and knowing when to use which is the key to controlling your final style.
Pixie Diffusing for Volume and Definition: This is the classic technique you've probably seen before. You gently cup a section of your hair in the diffuser's bowl and press it up toward your scalp. Hold it there for about 30-60 seconds before moving on. This method is a powerhouse for encouraging tight curl clumps and building incredible lift right at the root, since it dries your hair in a scrunched, accordion-like shape.
Hover Diffusing for Frizz Control: Just like it sounds, you'll hold the diffuser a few inches away from your hair, moving it around your head without actually touching the strands. Hovering is your best friend at the beginning of your routine. It gently sets the outer "cast" from your styling products without blowing apart your delicate curl patterns—a non-negotiable step for fighting frizz.
Pro Tip: The best results often come from a tag-team approach. I always start by hover diffusing all over until that product cast starts to feel firm. Then, I switch to pixie diffusing to build volume and get the lengths fully dry.
Before a single curl touches that diffuser, let's talk settings. Using the wrong heat and speed is the fastest way to undo all your hard work. High heat and high speed are the ultimate enemies of happy, defined curls.
Stick to low speed and medium heat. A powerful gust of air, even when diffused, will blast your curl clumps apart and create frizz. High heat is just as bad, leading to dryness, damage, and lackluster curls. A little patience goes a long way here; the gentle, slower approach always delivers healthier, more beautiful results.
This quick reference table will help you find the best settings for your hair type, so you get all the definition with none of the damage.
| Hair Type | Recommended Heat Setting | Recommended Speed Setting | Key Objective |
|---|---|---|---|
| Fine/Wavy Hair | Low to Medium | Low | Encourage waves without weighing them down |
| Curly Hair (3A-3C) | Medium | Low | Define curls and minimize frizz |
| Coily/Thick Hair | Medium to High | Low to Medium | Thoroughly dry dense hair while maintaining moisture |
| Damaged/Color-Treated | Low (or Cool setting) | Low | Gently dry without causing further stress or fading |
Remember, these are starting points. Don't be afraid to experiment to find what your unique hair loves best.
The visual below shows how a solid product routine supports your diffusing technique from start to finish.
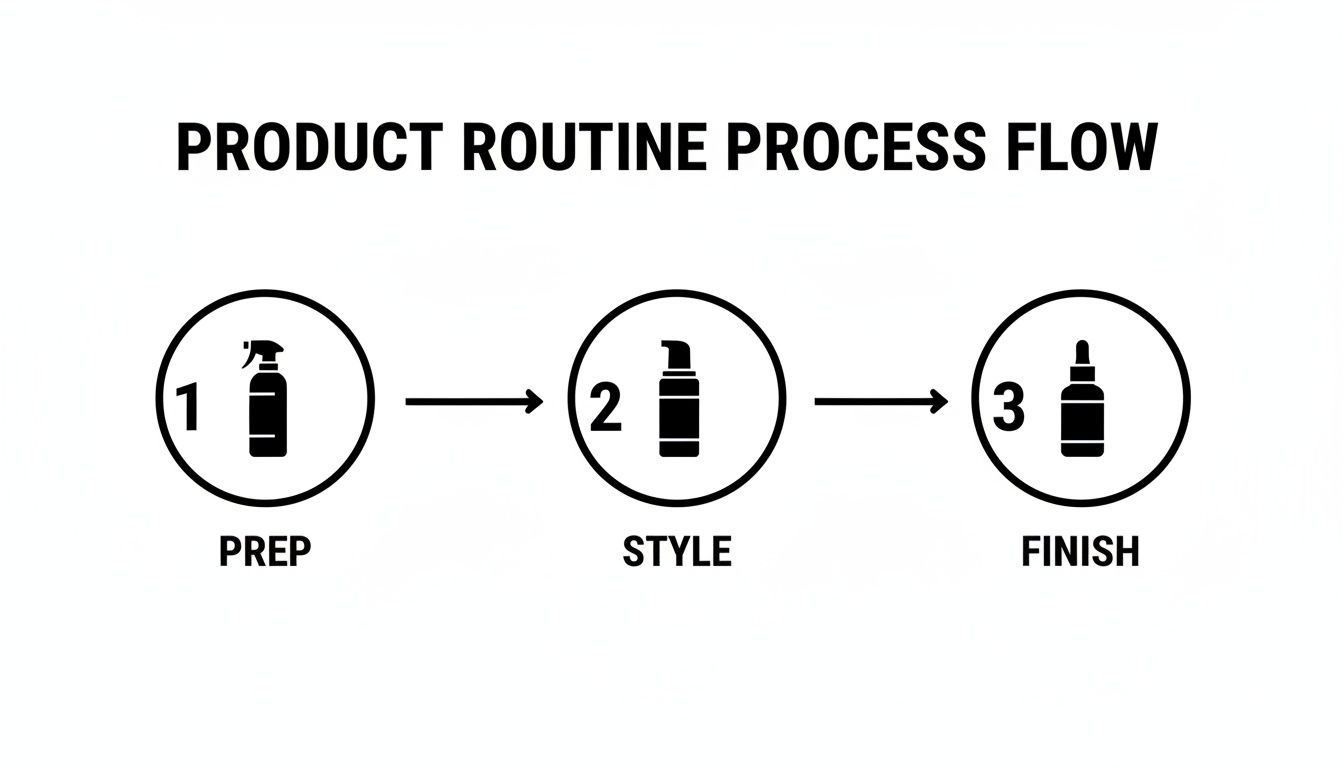
This simple flow—prep, style, finish—is the framework for making sure your hair has everything it needs to look its best when you diffuse.
Where you begin the drying process makes a huge difference. For maximum volume, always start at the roots. Flip your head upside down or to one side and focus the diffuser right on your scalp. You can even use the prongs to gently lift sections at the root, which helps prevent curls from drying flat against your head.
Once your roots feel about 50% dry, it's time to work on the mid-lengths and ends. Move through your hair in sections, using either the pixie or hover method based on the look you're going for. Keep at it until your hair is about 80-90% dry.
Stopping here is a pro secret for locking in moisture and fighting frizz. Letting your hair air-dry that last 10-20% prevents the over-drying that can make strands brittle. This final step allows your curls to settle into their natural pattern while holding onto hydration, giving you a softer, more polished finish.
For more expert advice on blowouts, our guide on how to master the art of blow-drying your hair at home has even more tips you'll love.
Even with the best prep and products, a few simple mistakes can derail your diffusing efforts, leaving you with a halo of frizz instead of the gorgeous curls you were hoping for. Learning how to use a hair diffuser is just as much about knowing what not to do.
Think of it this way: you’ve already spent time cleansing, conditioning, and applying your favorite stylers. The last thing you want is to mess it all up in the final stretch. Let's walk through the most common slip-ups I see and how to fix them for good.
This is, hands down, the number one mistake people make. It's so tempting to crank up the heat and blast your hair on high to speed things up, but this is a direct flight to Frizz City. That intense, hot air, even through a diffuser, will blow your curl clumps apart and rough up the hair cuticle.
What to Avoid: Blasting your hair on the highest heat and speed settings. This is just too aggressive for delicate curls.
How to Fix It: Patience is your best friend here. Always, always stick to low speed and low-to-medium heat. This gentle approach gives your curls the time they need to form and set properly without being disturbed, which is the key to a smooth, defined finish.
I know it's hard, but you have to resist the urge to constantly scrunch and run your fingers through your hair while it's drying. Your hands can create friction and break up the beautiful curl clumps you worked so hard to create. Every time you touch your damp hair, you're inviting frizz to the party.
The golden rule of diffusing is simple: hands off until your hair is 100% dry. Let the diffuser and your products do the work.
Once your hair is completely dry and you've scrunched out any product cast, then you can go in and gently fluff your roots for volume or shake out your curls.
Another frequent issue I see is not using enough product to give curls the structure they need. If your curls look undefined or fall flat within a couple of hours, you probably need a little more hold. Products that create a "cast" are specifically designed to hold your curl pattern in place while it dries.
It seems logical to keep diffusing until your hair is bone-dry, but this can actually backfire. Over-drying sucks essential moisture out of your hair, leaving your curls looking dull, brittle, and frizzy. Curls need hydration to look their best, and taking the drying process too far is a surefire way to dehydrate them.
The little secret is to stop just before your hair is completely dry. The goal is to diffuse until your hair is about 80% to 90% dry.
Letting your hair air-dry that last 10-20% helps lock in that final bit of moisture. This small tweak makes a huge difference, leading to healthier, shinier, and more defined curls in the long run.
So, you've got the basics down. You’ve mastered the hover and pixie techniques, and your hair is looking pretty good. But you're ready to go from "good" to unforgettable.
These next-level methods are the little secrets stylists keep up their sleeves. They’re all about making small, intentional tweaks that create incredible volume, flawless definition, and brilliant shine that actually lasts.
If you’re fighting a constant battle with flat roots—especially if your hair is long or heavy—root clipping will be a total game-changer. This simple trick lifts your roots while they dry, stopping gravity from pulling your style down before you’ve even left the house.
Before you even think about picking up your diffuser, grab some small metal clips. Duckbill or single-prong clips are perfect for this. Lift small sections of hair right at the crown and secure the clip at the root so it stands straight up from your scalp.
Once your hair is 100% dry, gently slide the clips out. The result? Lasting, natural-looking volume without a hint of teasing or sticky hairspray. For even more great ideas, check out our guide on how to make hair look fluffy.
Want curl definition that stands up to humidity and lasts for days? It’s time to master the "gel cast." This technique is all about using a strong-hold product, like a gel or mousse, to form a protective, slightly crunchy shell around your curls as they dry.
Think of this cast as armor for your curls. It locks the pattern in place and defends against frizz while you diffuse.
That initial crunchy feeling can be a little weird, but don't panic! It's actually a sign that the cast is doing its job perfectly. The real magic happens once your hair is completely dry and you gently "scrunch out the crunch."
To break the cast, put a few drops of a lightweight oil on your palms. Rub your hands together and gently scrunch your curls upward. You'll feel the cast dissolve, revealing incredibly soft, defined, and frizz-free curls underneath.
No two heads of hair are the same, so why would you use the same diffusing technique for everyone? Customizing your approach based on your hair's unique texture and length is the real key to a flawless finish.
For Long, Heavy Hair:
The sheer weight of long hair is notorious for stretching out curls and waves. To fight back, spend most of your diffusing time with your head flipped upside down using the pixie method. This helps defy gravity, encouraging your curls to spring up and giving you a much more voluminous, defined look.
For Fine or Wavy Hair:
Fine hair gets weighed down easily, so less is more. Stick to lightweight products and focus on hover diffusing to gently dry and set your waves without making them go limp. You can finish with a quick pixie diffuse at the roots for a little lift, but be careful not to over-scrunch your ends—that can make them look stringy. Learning how to tailor your diffuser use is what separates a good hair day from a great one.
Even after you've got the basics down, a few questions always pop up. Let's tackle some of the most common ones so you can diffuse with total confidence and get the gorgeous results you're after.
This is probably the number one question I get, and the honest answer is: it depends! Your hair's length, thickness, and even how much water it's holding will all play a part. But, to give you a rough idea, here’s a general timeline:
I know it can feel like a long time, but remember you're using low heat and low speed. That extra patience is what pays off in healthy, beautifully defined, frizz-free hair.
Yes, you absolutely can! While diffusers are a holy grail for curls, they're secretly amazing for adding life and volume to straight hair. It won't give you curls, but it will give your roots a major boost for a soft, bouncy, "just had a blowout" look.
The trick is to flip your hair upside down and use the diffuser's prongs to gently lift and massage the roots. This builds in volume that lasts, all without making your hair pin-straight like a concentrator nozzle would.
Pro Tip: Diffusing is also a much gentler way to dry straight hair. The heat is spread out, which means less direct, intense heat blasting your strands. You get all the volume with a lower risk of damage.
Think of it like any other styling tool—it needs a little TLC to perform its best. Over time, hair products, dust, and tiny bits of lint can clog the vents. When that happens, airflow gets blocked, and your diffuser won't work as well.
A quick clean once a month is perfect. Just grab a damp cloth and wipe it down. If you see any stubborn buildup in the vents or on the prongs, a small, soft brush (like an old toothbrush) works wonders to gently clear it out. It takes two minutes and keeps your tool in top shape.
Ready to perfect your styling routine? Explore the complete collection of hair care solutions at Morfose to protect, define, and add shine to every look. Shop the collection now.
