Flash Sale 70% Off
Give customers details about the banner image(s) or content on the template.
Are You One of Our Winners?

Frizz isn't just an annoyance; it's a distress signal. Your hair is telling you it's thirsty and needs a serious dose of moisture. To truly stop curly hair from frizzing, the mission is simple: keep the hair cuticle smooth and sealed. A sealed cuticle is your best defense, locking in hydration and blocking out the excess humidity that causes curls to swell and separate.
It all comes down to using the right products and, just as importantly, the right techniques to get that moisture deep into the hair strand and keep it there.
Before you can win the war against frizz, you have to understand the enemy. Frizz is the visible symptom of an internal moisture imbalance, and it all starts with the outermost layer of your hair strand—the cuticle.
Picture the cuticle layer as tiny, overlapping shingles on a roof. When your hair is healthy and well-moisturized, these shingles lie flat and smooth. This creates a uniform surface that reflects light (hello, shine!) and, more critically, seals precious moisture inside the hair shaft. But when that cuticle gets roughed up and lifted, the chaos begins.
A raised, open cuticle creates a rough, jagged surface. This is why frizzy hair often looks dull and feels coarse to the touch. But the real problem is that it essentially leaves the door wide open, creating a double-edged sword depending on the weather.
This is exactly why your curls can look amazing indoors, only to explode into a pouf the second you step outside on a humid summer day. The core issue remains the same: a compromised cuticle that can't regulate its own moisture. To get a better handle on your hair's specific needs, take a look at our guide on understanding your hair type.
So, what causes the cuticle to lift in the first place? Several culprits are usually at play. Damage is a big one—heat styling, chemical treatments like color or relaxers, and even rough towel drying can physically chip away at the cuticle, leaving it permanently raised.
Another huge factor is hair porosity, which is just a term for your hair's natural ability to absorb and hold onto moisture. High-porosity hair, which is very common among curlies, has a cuticle layer that is naturally more open. It drinks up water easily, but it loses it just as fast, turning hydration into a constant battle.
It’s no wonder curly and wavy hair types are the most frizz-prone. In fact, they dominate the anti-frizz product market, accounting for a 49.6% share because their structure is naturally more susceptible to dryness and uneven cuticles.
This decision tree shows how a raised hair cuticle responds differently to dry versus humid air, both leading to frizz.
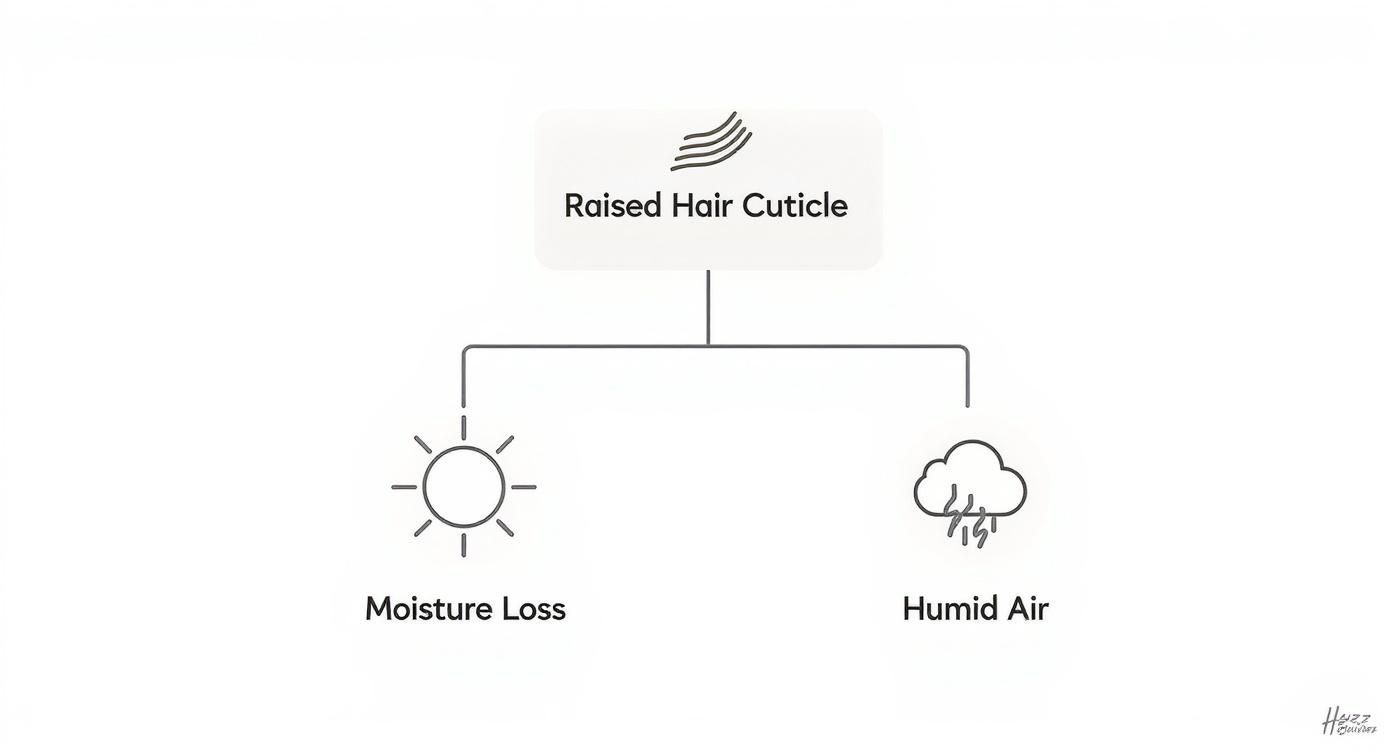
The image makes it clear: whether you're losing moisture or gaining too much, an unsealed cuticle is the root of the problem.
To help you pinpoint exactly what's causing your frizz, here's a quick reference guide. Identifying the trigger is the first step toward finding the right solution.
| Frizz Trigger | What It Looks Like | Primary Solution |
|---|---|---|
| Humidity | Hair poufs up and loses definition the moment you step outside. | Use anti-humectant styling products (like gels or mousses with strong hold) to create a protective barrier. |
| Damage | Frizz is concentrated on the ends; hair feels rough and brittle even when wet. | Incorporate deep conditioning treatments and protein masks to repair and strengthen the hair shaft. |
| Dryness | A consistent, dull "halo" of frizz, even in low humidity. Curls may lack bounce. | Focus on hydration: use moisturizing shampoos, leave-in conditioners, and apply stylers to very wet hair. |
| Friction | Frizz appears after sleeping, wearing a hat, or from rough towel drying. | Switch to a silk or satin pillowcase, use a microfiber towel or cotton t-shirt, and protect hair at night. |
By recognizing these patterns, you can stop guessing and start treating the specific issue your hair is facing.
The ultimate goal is not just to add moisture but to create an environment where your hair can hold onto it. Sealing the cuticle is the most crucial step in any anti-frizz routine.
Once you identify whether your frizz stems from your hair's natural porosity, environmental factors, or accumulated damage, you can finally stop the frustrating cycle of trial and error. The rest of this guide is designed to help you build a routine that tackles these root causes for good, setting you on the path to smooth, defined, and consistently beautiful curls.
Winning the war against frizz doesn't start with styling products. It actually begins the moment you step into the shower. A solid wash day routine is your first, and most powerful, line of defense. It creates a smooth, hydrated canvas that truly sets the stage for flawless, frizz-free curls. Every little choice you make here—from the water temperature to how you apply conditioner—plays a part.
Think of your hair like a delicate silk shirt. You wouldn't just toss it into a hot, aggressive wash cycle and expect it to come out looking great. Your curls need that same level of mindful care to keep their structure and prevent the cuticle from getting roughed up.
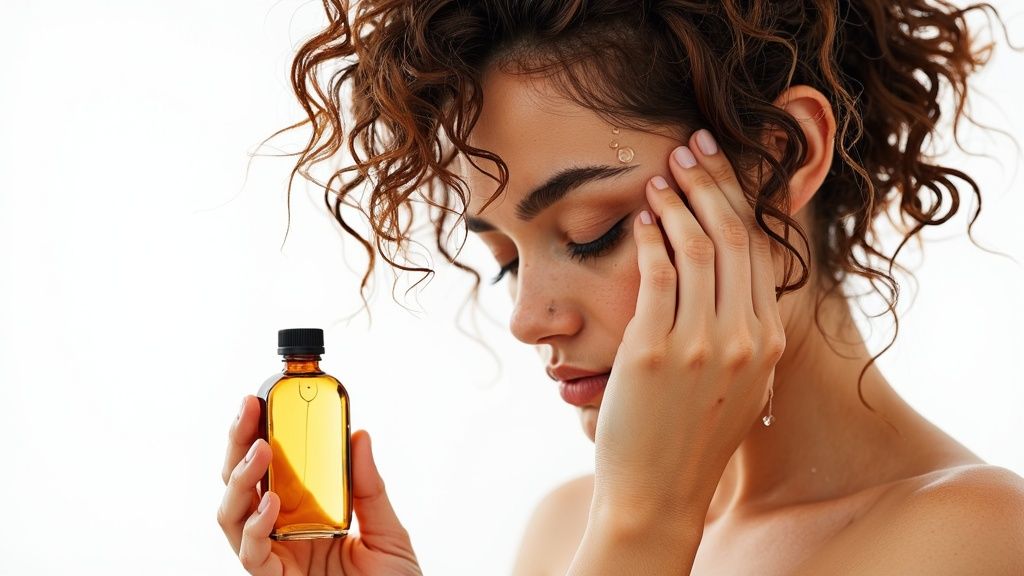
Before a single drop of water hits your hair, you have an opportunity to fortify it. A pre-shampoo treatment, or "pre-poo," is an absolute game-changer for anyone dealing with dryness and frizz. This is especially true if you have high-porosity hair that soaks up and loses moisture easily.
Just apply a lightweight oil or a dedicated pre-wash mask to your dry hair and let it sit for at least 30 minutes. This simple act creates a protective barrier around the hair shaft. Why does that matter? It stops your shampoo from stripping away too much of your hair's natural oils. This prevents something called hygral fatigue—the weakening of hair from the constant swelling and shrinking as it absorbs and loses water.
This one step ensures your cleanser can do its job of cleaning your scalp without leaving your ends feeling parched and ready to frizz up at the first sign of humidity.
The shampoo you use can either be your best friend or your worst enemy in the fight against frizz. Many shampoos, especially those with sulfates like sodium lauryl sulfate, create a satisfying lather but are far too harsh for curly hair, which is naturally on the drier side.
Instead, reach for a sulfate-free shampoo or even a co-wash (a cleansing conditioner). These gentler formulas clean your scalp effectively without wrecking the delicate moisture balance your curls need to thrive. If you're serious about stopping frizz, this switch is non-negotiable. It helps keep the hair cuticle lying flat right from the start.
Quick tip from experience: The goal of washing is to clean your scalp, not to scrub your hair strands until they squeak. Focus the shampoo on your roots and just let the suds run down the lengths of your hair as you rinse.
Conditioner is where the real hydration magic happens. But if you're just slapping it on and rinsing it right out, you're missing a huge opportunity. To get that deep-down moisture that leads to defined, juicy curl clumps, you need to be a bit more strategic.
This is where the famous "squish to condish" method comes in. It’s a classic for a reason. After applying a generous amount of conditioner, don't just rinse it under the showerhead. Try this instead:
This technique does more than just hydrate; it helps form the foundational curl clumps that will define your final style. Once every strand is coated and sealed, you might find a leave-in conditioner is the perfect next step to lock it all in. If you're wondering exactly how they help, you can unlock the secrets of leave-in conditioner in our ultimate guide.
Your very last step in the shower is one of the most crucial for preventing frizz. The water temperature and how you handle your curls at this stage can either seal the deal or undo all your hard work.
Lukewarm to Cool Water is Your Friend
Hot water feels amazing, but it lifts the hair cuticle, essentially sending an open invitation to frizz. Always finish with a lukewarm or even cool water rinse. This simple change helps snap the cuticle shut, locking in all that moisture you just worked so hard to get in there. A sealed cuticle means a smoother, shinier surface that's much more resistant to humidity.
Here’s a quick breakdown of how water temperature really affects your curls:
| Water Temperature | Effect on Hair Cuticle | Impact on Frizz |
|---|---|---|
| Hot | Lifts and opens the cuticle. | Encourages moisture loss and lets humidity in, increasing frizz. |
| Lukewarm/Cool | Helps seal the cuticle flat. | Locks in moisture and creates a smooth surface, reducing frizz. |
Finally, whatever you do, don't wring out or aggressively towel-rub your hair. When your final rinse is done, just gently squeeze out the excess water. Hair is at its most fragile when it's wet, and any rough handling at this point will instantly disrupt your curl pattern and create frizz. This complete wash routine—from pre-poo to cool rinse—builds a resilient, hydrated foundation that makes every styling product you use afterward work so much better.
Even with the best prep in the shower, your styling game is where the magic really happens. We've all been there—you have the perfect products, but if you don't apply them the right way, you can go from defined curls to a halo of frizz in no time. Think of this as building a protective shield that keeps your curls looking their best all day long.
The single most important rule? Apply your products to soaking wet hair. I'm not talking about damp or towel-dried hair; it needs to be dripping. Water is the key to evenly distributing your stylers and capturing your natural curl clumps before they have a chance to separate and frizz up. Trying to style damp hair just pushes frizz around, while styling truly wet hair smooths it down for good.
Getting the sequence right when you layer products is everything. Each one has a specific job, and if you get the order wrong, you could end up with sticky, weighed-down curls that don't hold their shape. It’s a lot like painting: you wouldn't skip the primer or the topcoat, right?
First, a Leave-in Conditioner: This is your primer. On soaking wet hair, it lays down a foundation of moisture and gives your hair slip, making everything else you apply work that much better. It's your first defense against the dryness that often leads to frizz.
Next, a Curl Cream: Now you’re adding a layer of hydration and softness. A quality curl cream helps your curl clumps band together, adds a soft definition, and delivers another dose of moisture to keep every strand flexible and happy.
Finally, Gel or Mousse: This is your sealant. Gels and mousses are what provide the hold and create a protective "cast." This slightly crunchy shell locks in all that moisture and shields your curls from humidity. The cast is your secret weapon for long-lasting, frizz-free style.
This combination works because it tackles frizz from the inside out. The leave-in and cream quench your hair's thirst for moisture, while the gel or mousse forms a barrier against whatever the environment throws at it.
My biggest mistake for years was skipping gel. I hated that crunchy feeling, not realizing the "crunch" was actually a sign the product was doing its job! You're meant to gently scrunch it out once your hair is dry, which reveals soft, defined, and frizz-proof curls underneath.
How you apply your stylers matters just as much as what you apply. If you just rake products through your hair, you'll tear apart those beautiful curl families you worked so hard to form in the shower. The goal is to coat the hair gently without disrupting its natural pattern.
Try the Praying Hands Method
This is my go-to for glazing product over my curls. Just rub the product between your palms, then sandwich a section of hair between them and glide your hands down from root to tip. It smooths the hair cuticle and gives you an even coating without any pulling.
Scrunch for Extra Definition
After your products are in, it’s time to encourage that curl pattern. Gently cup the ends of your hair in your palms and scrunch upwards toward your scalp, pulsing a few times. You’ll literally feel your curls spring up.
So, what about day two or three? Keeping curly hair from frizzing doesn't stop on wash day. The trick to a great refresh is adding targeted moisture, not soaking your whole head all over again.
Whatever you do, avoid messing with your dry hair too much—that's a fast track to creating frizz. The goal is simply to reactivate the products already in your hair with a minimal touch. Once you get the hang of these styling and refreshing techniques, you'll feel completely in control of your curls.
You've made it through cleansing, conditioning, and styling. Your curls are looking perfect. But now comes the most delicate part of the whole routine: drying. How you handle your hair right now can either lock in all that gorgeous definition or, well, shatter it into a frizzy halo before it's even dry. This is all about gentle hands and smart protection.
First things first, please, ditch your regular bath towel. I can't say this enough. Those rough terrycloth loops are a curly-haired person's worst enemy. They snag on your delicate strands, rough up the cuticle, and suck out way too much water, way too fast. It's an instant recipe for frizz and disrupted curl patterns.
Instead, grab a soft, old cotton t-shirt or invest in a proper microfiber towel. The surface on these is so much smoother and glides right over your hair. Use it to gently scrunch out the extra water—just cup your curls and press them up toward the scalp. This technique, which many people call "plopping," gets rid of just enough moisture without creating that dreaded friction.
While air-drying is the gold standard for avoiding damage, let's be real, it isn't always practical. When you're in a hurry, a diffuser is your best friend, but only if you use it the right way. Blasting your hair with high heat and high speed is a one-way ticket to frizz city.
The secret to a great diffusing session is patience and control. The whole idea is to dry your curls in their natural state, not blow them all over the place.
This methodical approach is what keeps that forceful air from breaking apart your beautiful curl clumps, preserving the definition you worked so hard to get.
Your anti-frizz game doesn't stop when your head hits the pillow. Tossing and turning all night on a standard cotton pillowcase creates an incredible amount of friction. You're basically roughing up your hair's cuticle for eight hours straight. Is it any wonder you wake up with frizz, tangles, and a style that's been completely squashed?
Luckily, the fix is simple and makes a huge difference. Switching your cotton pillowcase for one made of silk or satin is a game-changer. The smooth, slick surface lets your hair glide across it with almost zero friction, which helps preserve your curl pattern and keeps frizz at bay.
Think of it this way: a single night on a cotton pillowcase can undo every single step of your routine. A silk pillowcase is a true investment in making your wash day results last.
Another fantastic trick is to protect your hair in a loose style while you sleep. The "pineapple" is a classic for a reason. Just gather all of your curls into a very high, loose ponytail right on top of your head and secure it with something gentle, like a scrunchie. This lifts the hair off your neck and pillow, keeping your curls from getting crushed.
When you wake up, all you need is a quick shake and maybe a light refresh. Combining a pineapple with a silk pillowcase is the ultimate power duo for getting multi-day curls without the frizz.

We’ve all been there. The routine that gives you perfect, frizz-free curls in the dead of winter suddenly turns into a puffy disaster on the first humid day of summer. To truly master your curls year-round, you have to think like a strategist, ready to adapt your product lineup to whatever the weather throws at you.
It's not just about what the humidity percentage says; the real secret is understanding the dew point. Simply put, the dew point is the temperature where the air gets saturated with moisture. This little number tells you whether your hair needs products that lock moisture out or ones that pull it in.
When the air feels thick and damp, your curls are desperately trying to drink all that moisture right up, which leads to swelling, frizz, and a loss of definition. This is when certain ingredients, like the ever-popular glycerin, can actually become your enemy.
Glycerin is a humectant, which means it grabs moisture from the air. In a super-humid environment, it can pull in way too much moisture, turning your defined curls into a puffy cloud. During these sticky times, your main goal is to build a strong shield.
This isn't just a local struggle; it's a global one. The demand for powerful frizz control is skyrocketing in places like the Asia Pacific region, where humidity is a daily reality. Countries like India and China are set to become major players in the anti-frizz market over the next few years.
Want a more detailed plan for tackling sticky weather? Check out our guide on how to prevent and manage frizzy hair in humid weather.
Now, let's flip the script. On a crisp, cold winter day or in a heavily air-conditioned office, the dry air is actively trying to suck the moisture right out of your hair. This is what leads to that brittle, staticky kind of frizz.
Remember those humectants that caused trouble in the summer? In dry air, they become your most valuable players.
By simply checking the dew point and tweaking your product choices, you can stay in control of your curls and keep them looking incredible, no matter what's on the forecast.
Even when you think you've nailed your routine, some nagging questions always seem to pop up. Let's dig into some of the most common frustrations that stand between you and smooth, happy curls.
Ah, the classic morning-to-night frizz explosion. This is a tell-tale sign that something's off, and it almost always comes down to one of two culprits: a deep-seated moisture issue or a weak product cast.
If your hair is dehydrated from the start, it will spend all day reaching out to the air for moisture. That action causes the hair cuticle to swell up and, you guessed it, frizz.
The other possibility? Your styling products just don't have enough holding power. If your gel or mousse creates a soft, flimsy cast, it's going to break down fast, leaving your curls totally exposed to humidity and friction. The fix is usually a one-two punch: start with a seriously hydrating leave-in on soaking wet hair, then lock it all in with a stronger-hold styler that forms a solid, protective shield.
You bet they can. Some ingredients are notorious for creating the very problem you’re trying to solve. Becoming a savvy label-reader is one of the most important skills you can develop in your curly hair journey.
The goal should be frizz management, not total elimination. A little bit of frizz is a natural part of having curly hair and adds beautiful volume and character. The aim is healthy, defined curls where frizz is an afterthought, not the main event.
Product buildup is one of the sneakiest causes of frizz. When products leave a film on the hair shaft, they create a barrier that blocks moisture from getting in. The result is dull, dry, and frizzy hair.
How often you need to hit the reset button with a clarifying shampoo really depends on your routine.
If you regularly use products loaded with heavy butters, oils, or non-water-soluble silicones, you might need to clarify every 3-4 weeks. On the other hand, if you mostly stick to lighter, water-soluble formulas, you might get away with clarifying just once a month or even less. The biggest clue it's time? When your go-to products suddenly seem to stop working or your curls feel limp and weighed down.
Honestly, chasing 100% frizz-free hair is a recipe for frustration. A completely sleek, uniform look isn't how most curl types behave naturally. Trying to force it often leads to overusing heavy products that just smother your hair’s life and bounce.
A small, soft halo of frizz—sometimes called a "curl canopy"—is perfectly normal and a sign of healthy hair.
The techniques in this guide are all about creating defined, hydrated, and manageable curls. When your hair has the moisture and protection it needs, frizz becomes minimal and easy to deal with. It's about working with your hair's incredible texture, not fighting to make it something it's not.
Ready to build your ultimate anti-frizz routine? The Morfose collection offers targeted solutions, from hydrating Milk Therapy conditioners to strong-hold styling products, designed to give your curls the moisture and protection they need. Explore the full range at https://themorfose.com.
