How to Master the Art of Blow-Drying Your Hair at Home
Posted by MORFOSE COSMETICS

Essential Tools and Products for a Perfect Blowout
Mastering the art of blow-drying your hair at home begins with having the right tools and products at your disposal. In this guide, we'll explore the essential items you need to achieve salon-quality results without leaving your house. Let's dive in.
The Must-Have Blow Dryer Features for Salon-Quality Results
Investing in a high-quality blow dryer is the first step to a successful home blowout. Look for these features to ensure you're on the right track:
Ionic Technology:
Blow dryers with ionic technology release negative ions that break down water molecules faster. This not only speeds up drying time but also reduces frizz and enhances shine.
Variable Heat and Speed Settings:
Different hair types require different heat and airflow levels. Having adjustable settings allows you to customize your blowout experience.
Cool Shot Button:
A cool shot button helps set your style in place and adds a boost of shine.
Concentrator Nozzle:
This attachment directs airflow precisely, making it easier to control the direction of your hair.
Heat Protectants and Styling Products: Your Hair's Best Friends
Before you even think about turning on your blow dryer, it's essential to apply the right products to protect your hair from heat damage and achieve your desired style:
Heat Protectant Spray:
A heat protectant spray creates a barrier between your hair and the heat of your blow dryer. It's a must-have to prevent damage and keep your locks healthy.
Styling Cream or Serum:
Depending on your hair type and style goals, consider using a styling cream or serum to add smoothness, volume, or texture.
Volumizing Mousse:
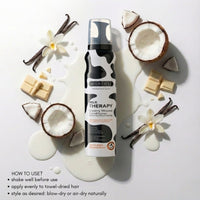
If you're aiming for extra volume, a volumizing mousse can give your hair a lift that lasts.
Shine Serum:
To finish your blowout with a radiant shine, a shine serum is your secret weapon.
The Right Brushes and Combs: Picking the Perfect Tools for Your Hair Type
The choice of brushes and combs can make a significant difference in achieving the perfect blowout. Selecting the right tools for your hair type is crucial:
Paddle Brush:
Paddle brushes work well for long, straight hair, and they help distribute heat evenly.
Round Brush:
For adding volume, curls, and waves, a round brush is your go-to tool. Smaller barrels create tighter curls, while larger ones add waves and volume.
Wide-Tooth Comb:
If you have curly or textured hair, a wide-tooth comb is excellent for detangling without causing breakage.
Vent Brush:
Vent brushes are designed for quick drying and work best for shorter hair.
With these essential tools and products in your arsenal, you're well on your way to mastering the art of blow-drying your hair at home. Stay tuned for our step-by-step guide on achieving a professional blowout in the next installment of our series.

Step-by-Step Guide to Achieving a Professional Blowout
At Morfose, we understand that achieving a salon-quality blowout at home can be a game-changer for your daily look. To help you master this art, we've prepared a step-by-step guide that covers everything from prepping your hair to adding those final touches for a polished finish. Let's get started!
Prepping Your Hair: Towel Drying, Detangling, and Applying Products
- Start with Clean, Towel-Dried Hair: After washing your hair, gently towel dry it to remove excess moisture. Avoid vigorous rubbing, which can cause frizz.
- Apply a Heat Protectant: Protect your locks by applying a heat protectant spray or serum. This creates a barrier between your hair and the heat of your blow dryer.
- Detangle with Care: Use a wide-tooth comb to detangle your hair gently. Start from the ends and work your way up to prevent breakage.
Sectioning Your Hair for Efficiency and Precision
- Divide Your Hair: To ensure even drying and styling, divide your hair into sections. Use clips or hair ties to secure each section out of the way.
- Begin with the Bottom Section: Start blow-drying the lower sections of your hair first. This ensures that you won't miss any strands and that your upper layers don't weigh down the bottom.
- Work from the Roots: Use your blow dryer's concentrator nozzle to focus on the roots first, moving the dryer from side to side for even heat distribution.
Blow-Drying Techniques for Smoothness, Volume, and Curls
- Use a Round Brush for Volume: If you're looking for volume, use a round brush. Wrap your hair around the brush while blow-drying for added lift and curls.
- For Straight Styles: To achieve a sleek, straight look, use a paddle brush or a flat brush. Pull your hair taut as you follow the brush with the dryer.
- Add Curls and Waves: If you want curls or waves, wrap sections of your hair around the brush and hold them in place with the dryer's heat. Then, release for beautiful curls.
Finishing Touches: Locking in Your Style and Adding Shine
- Cool Shot for Setting: After you've styled each section, use the cool shot button on your dryer to set your style in place.
- Apply a Shine Serum: Finish by applying a shine serum or hair oil to add a radiant finish and lock in moisture.
- Final Check: Take a moment to ensure your hair looks as desired. Make any final adjustments if needed.
With this step-by-step guide, you're well-equipped to achieve a professional blowout from the comfort of your home. Remember, practice makes perfect, so don't be discouraged if it takes a few tries to get your blowout just right. Stay tuned for more hair care tips and product recommendations from Morfose.


