Flash Sale 70% Off
Give customers details about the banner image(s) or content on the template.
Are You One of Our Winners?

Learning how to cut your own hair can be empowering, saving you time and money while giving you full control over your style. It all comes down to four key steps: gathering the right tools, prepping your hair, sectioning it off, and cutting with a steady hand. Mastering these fundamentals is the secret to achieving a clean, polished look right from your own bathroom. This guide will walk you through everything you need for salon-quality results at home.
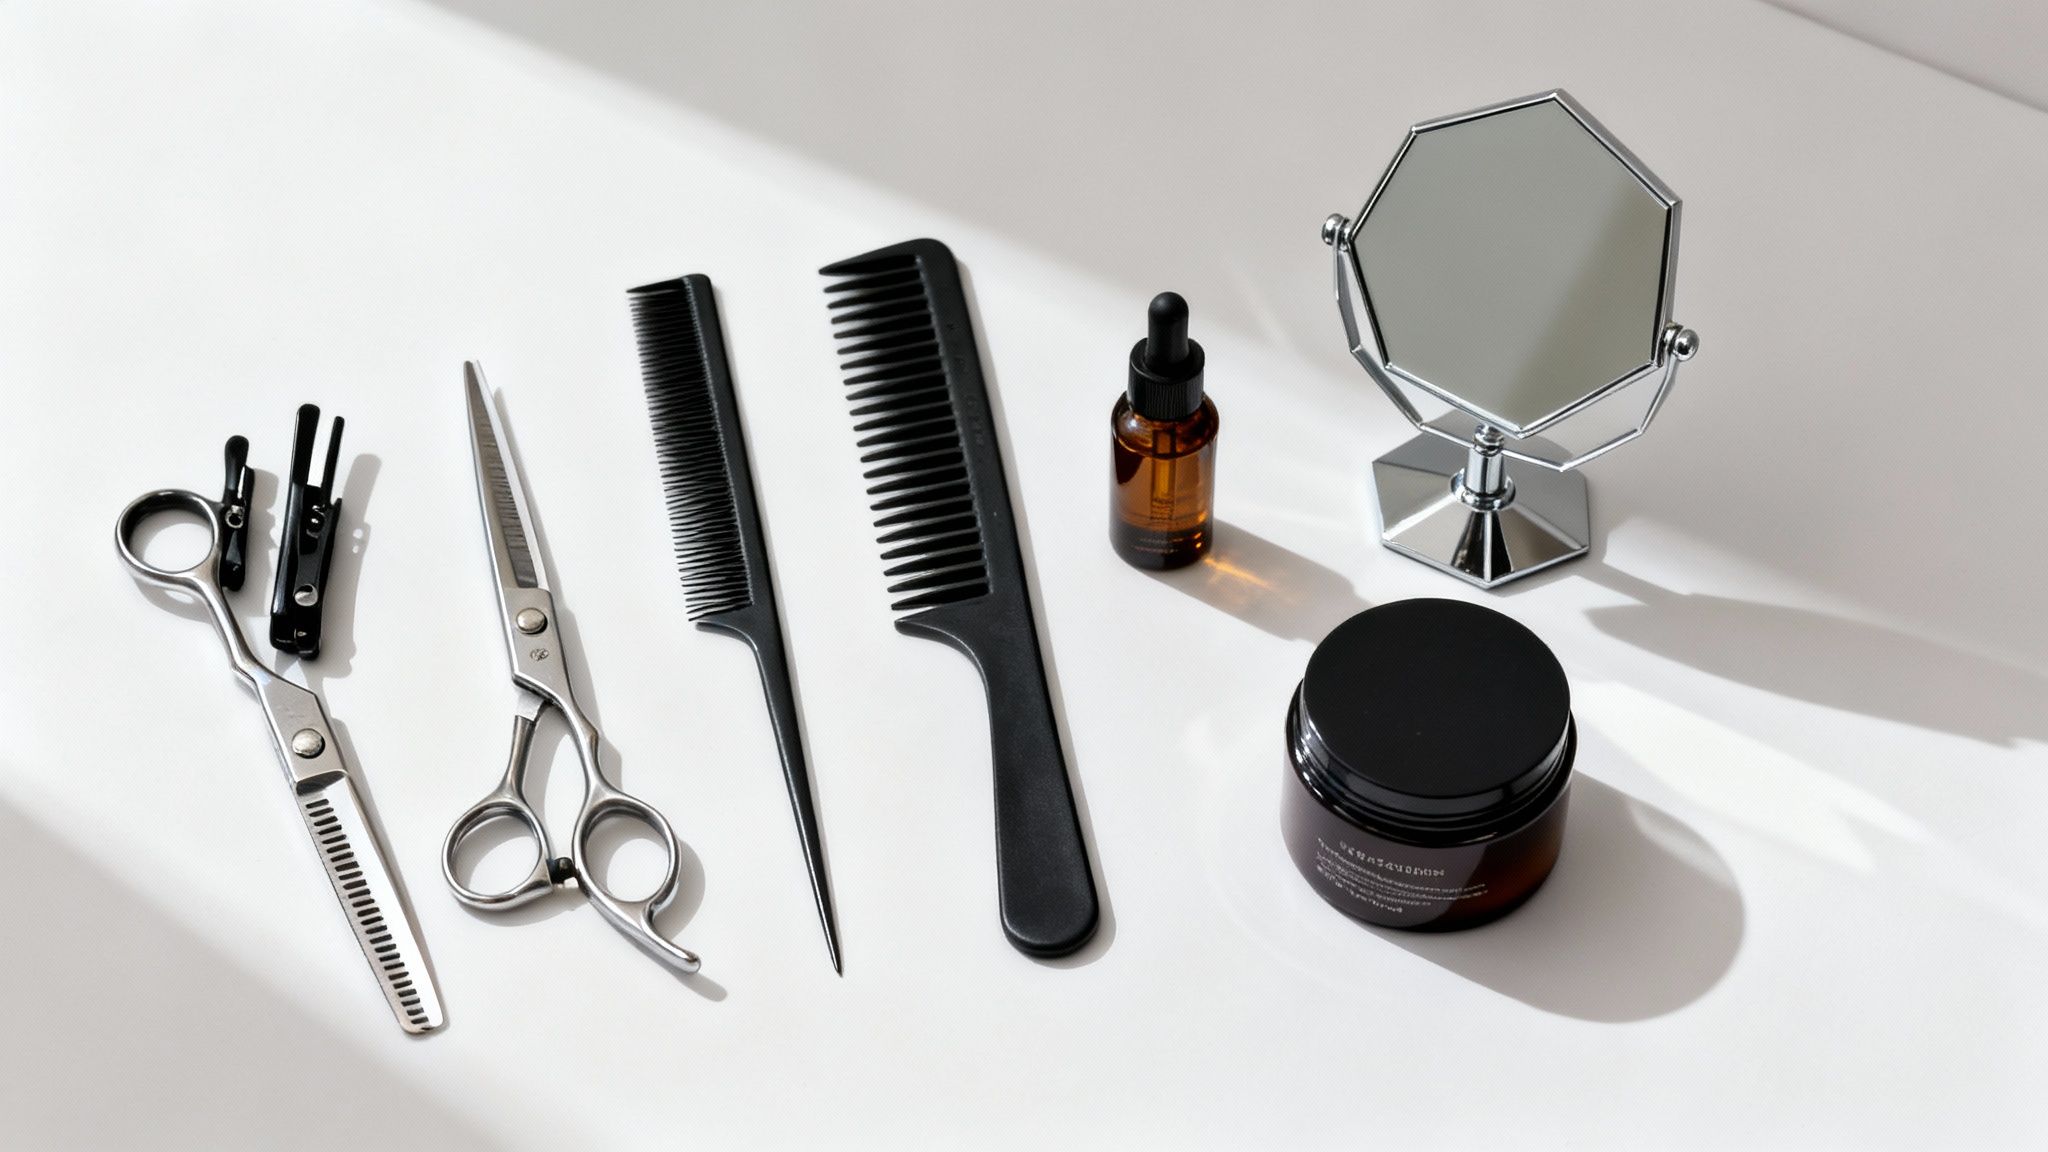
Before you make that first snip, it's crucial to set up your workspace. Assembling the right equipment is what separates a DIY disaster from a salon-quality result. This isn't the time to grab kitchen scissors from the junk drawer; the right tools give you control, precision, and a much cleaner finish.
You're not alone in wanting to take charge of your own trims. The global DIY haircut kits market was valued at around USD 932.28 million back in 2025 and is on track to nearly double by 2033. This isn't just a fleeting trend; it’s a major shift in how people are approaching their grooming. You can read the full research on this growing market if you're curious about the numbers.
Your absolute non-negotiable is a pair of professional hair-cutting shears. Their blades are incredibly sharp for a reason—they cut hair cleanly without bending or crushing the strands. Using dull, everyday scissors is a one-way ticket to split ends and a frayed, uneven mess.
Beyond the shears, you'll need a few other essentials to keep your work organized and accurate.
To make it even easier, here's a quick checklist of the absolute must-haves for getting the job done right.
| Tool | Primary Function | Why It's Essential |
|---|---|---|
| Professional Shears | Cleanly cutting hair | Prevents split ends and ensures a sharp, precise line. |
| Sectioning Clips | Holding hair sections apart | Keeps your workspace tidy and prevents accidental cuts. |
| Fine-Tooth Comb | Creating precise parts | Allows for clean sectioning and accurate guidelines. |
| Multi-Angle Mirror | Viewing all sides of your head | Ensures you can see the back and sides for an even cut. |
Don't forget to think of your aftercare products as part of your toolkit, too. A fantastic cut deserves great maintenance to keep it looking fresh. A quality serum or a deep-conditioning hair mask will be your secret weapon for keeping those newly trimmed ends healthy, smooth, and polished long after you’ve put the scissors down.
The secret to a haircut you’ll love—one that’s predictable and even—doesn't actually start with the scissors. It begins with the prep work. If you follow the same foundational steps a stylist uses, you're setting yourself up for success and avoiding common DIY mistakes. Think of this prep as your roadmap to a clean, manageable cut.
First, you have to make a big decision: should you cut your hair wet or dry? There's no single right answer, as it depends on your hair type and the look you're going for.
Cutting hair while it's wet is the classic salon method for a good reason. Water weighs the hair down, making it easier to pull taut and create super straight, precise lines. This is usually the best route for anyone with straight or wavy hair aiming for a sharp, blunt finish—like a classic bob or a simple, single-length trim.
However, wet hair can be deceptive. It stretches, so what looks like a one-inch trim can easily turn into a two-inch chop once your hair dries and shrinks. This is especially true for curls and coils.
This is exactly why dry cutting is a total lifesaver for curly and coily hair. It lets you see precisely how your hair falls and where each individual curl lives, making sure you don't accidentally take off too much length or mess up your natural curl pattern. It’s the ultimate "what you see is what you get" method.
Once you've figured out the wet-or-dry situation, it's time to get your hair in the best possible shape. You want to start with a clean, well-conditioned canvas.
Wash and Condition Like You Mean It Your hair needs to be completely free of product buildup, oils, and tangles. A clean slate ensures your scissors can glide through smoothly and your sections are accurate. If you have a lot of product in your hair, use a clarifying shampoo, followed by a hydrating conditioner to make strands soft and manageable. This step is non-negotiable.
Detangle with a Gentle Hand After conditioning, it’s time to gently work through any knots. Don't rip or pull through tangles, as this causes breakage and stretches your hair unevenly, which can lead to a choppy, uneven cut.
Trying to cut all your hair in one go is a recipe for disaster. Sectioning is the most important organizational step because it breaks the job into small, manageable parts. This technique keeps you from getting overwhelmed and ensures you cut every part of your head to the same length.
Grab your sectioning clips and divide your hair into at least four main quadrants: a left and right section at the front, and a left and right section at the back. If your hair is especially thick, you might even need six to eight sections. Use your fine-tooth comb to create clean, crisp parts—this will make your guidelines crystal clear and give you a much more professional-looking final result.
Alright, your hair is prepped and ready to go—now for the main event. This is where we get into the actual cutting methods that work best for different lengths and textures. Learning how to cut your own hair isn't about one magic technique; it's about finding the right approach for your unique style.
Before you pick up those scissors, it's worth visualizing the three core steps of preparation.
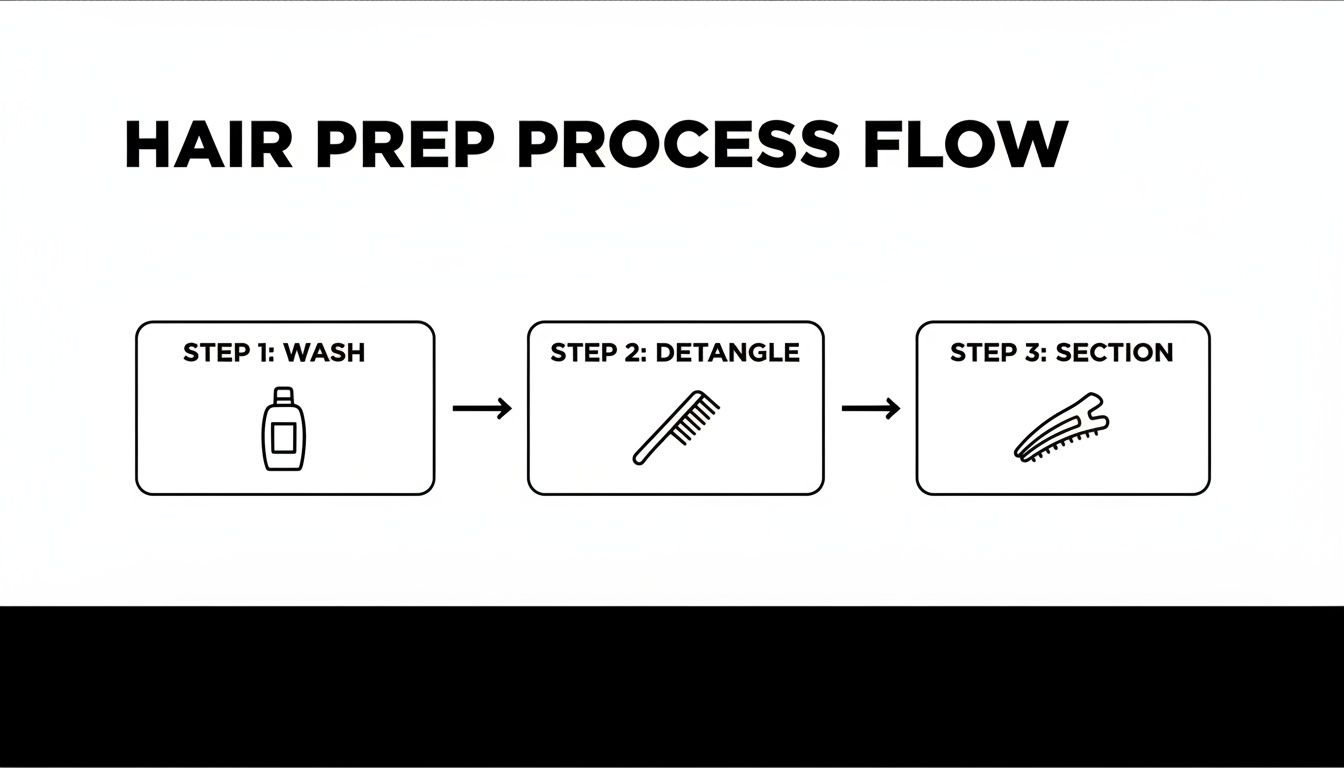
A great cut starts on a clean, detangled, and well-organized foundation. Once you've got this down, you can move forward with confidence.
The boom in at-home haircuts has created a huge market for DIY tools. The global DIY haircut kits market was valued at USD 9.9 billion in 2025 and is projected to hit USD 12.3 billion by 2035. This just goes to show how many of us are embracing the convenience and control of trimming our own hair.
If you have long hair, your main goal is probably getting rid of split ends and maintaining your length without creating a wonky, uneven line. Luckily, there are a couple of beginner-friendly methods that make this surprisingly simple.
The Ponytail Method for an Even Trim This is the classic go-to for a fast, straightforward trim that leaves you with a soft, U-shaped finish.
Twist-Cutting for Face-Framing Layers For those who want to add some soft, face-framing pieces, the twist-cutting technique is a fantastic option. It adds gentle movement around your face.
Just take a small, one-inch section from the front where you want the layers to start. Twist it tightly, then use your shears to snip into the twist at a downward angle. This gives you a much softer, more blended layer than if you had cut straight across.
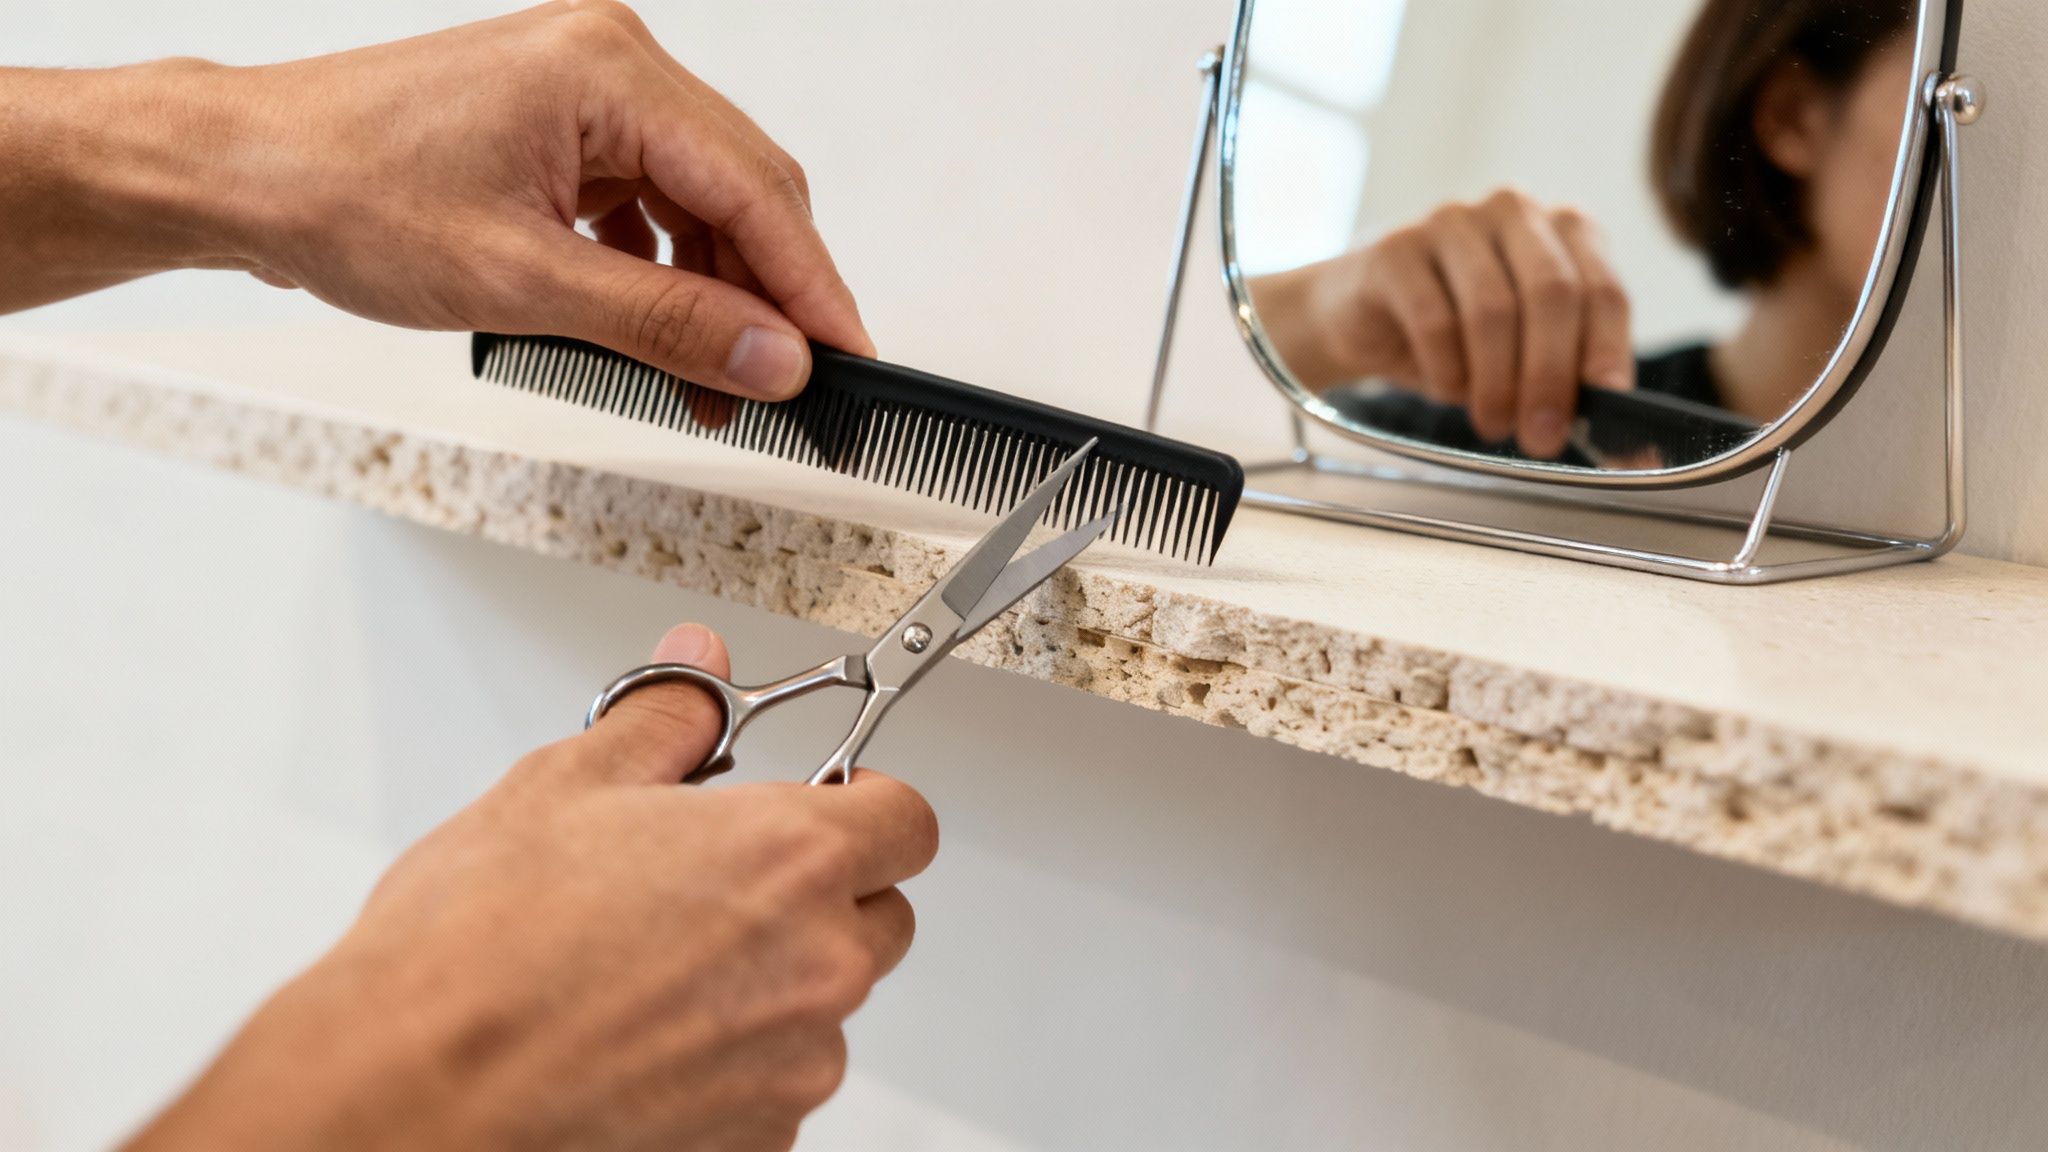
For anyone rocking a bob or a lob, precision is everything. The goal here is a crisp, blunt line that looks sharp and intentional. This definitely requires a steady hand and meticulous sectioning.
Start by parting your hair exactly where you normally wear it. Next, create small, one-inch-wide horizontal sections at the nape of your neck, clipping the rest of your hair up and out of the way.
Using a fine-tooth comb, pull that first section down so it's taut and straight. Holding it between your index and middle fingers, snip straight across in small, careful cuts. This very first section is now your guide for the entire haircut.
Pro Tip: Always, always cut less than you think you need. You can go back and trim more, but you can't glue length back on. A good rule of thumb is to aim for half of what you initially planned to take off.
Now, let down the next horizontal section and comb it smoothly over your guide. Cut this new section to match the length of the one you just did. Keep repeating this process, working your way up your head until all the hair is cut.
If you've got short hair, your focus is probably on maintenance—keeping the shape clean and tidying up the edges. The most critical spots are always the neckline and the hair around your ears.
For the neckline, grab a handheld mirror so you can see the back of your head in your main bathroom mirror. You can use clippers with a guard or very carefully use the tip of your shears to trim any strays, just following your natural hairline.
To clean up around your ears, comb the hair forward and trim a neat line that follows the curve of your ear. Then, comb it back into place and snip any little pieces that look out of place. It’s a small detail, but it makes a huge difference in how polished a short cut looks. When you want a polished appearance for something like professional headshots, mastering these details is key.
For those blessed with curly or coily hair, a standard trim can sometimes mess with your natural curl pattern. That's where dusting comes in. It’s a micro-trimming technique designed to snip off split ends without sacrificing your length or shape.
To dust your hair, you have to work with it while it's completely dry and in its natural, curly state. This is crucial for seeing exactly how each curl falls. Understanding your texture is everything here; if you're not sure about yours, it's worth learning how to know what hair type you have to give it the best care.
Go through your hair, curl by curl, or in small sections. Look for any ends that look frayed, split, or almost transparent. Using your sharp shears, snip off just the very tip of the damaged end—we're talking no more than a quarter of an inch. It’s a patient, meticulous process, but it's the absolute best way to maintain the health and integrity of your gorgeous curls.
Even with the most careful planning, slip-ups can happen when you're your own stylist. The most important thing is not to panic. Trust me, nearly every common haircut mishap has a surprisingly simple fix.
Think of this as your troubleshooting guide. Knowing what to do before you even start gives you the confidence to snip away, knowing you're prepared for whatever happens.
This is the big one. We've all been there—you step back from the mirror and see a wonky, uneven line staring back at you. Your first instinct might be to make one big, correcting chop, but that's a fast track to losing way more length than you wanted.
The real solution is patience and precision. Stand squarely in front of your mirror and find the longer side. Now, instead of cutting across, use just the very tips of your scissors to make tiny, vertical snips into that longer section. This method is called point cutting, and it works wonders to soften the line, making any correction blend in seamlessly.
Never try to fix a crooked line in one single, horizontal snip. Micro-adjustments are your best friend. Small, deliberate cuts give you maximum control and prevent a minor mistake from becoming a major one.
Another common pitfall is creating layers that don't blend, leaving you with a noticeable "shelf" where one layer stops and the next one starts. This usually happens if your hair sections were too thick or you used too sharp of an angle when cutting.
The fix? More point cutting.
Repeat this process along the entire shelf until the layers start to melt into each other. It’s a game-changer for creating that soft, professional-looking flow.
It’s the fear that haunts every DIY haircut. That one little snip goes too far, and suddenly your hair is much shorter than you planned. You can't put the hair back, but you can absolutely work with it.
First off, embrace texture. Waving or curling your hair can do an amazing job of disguising uneven spots and makes any shorter length look totally intentional. A good texturizing spray will also add volume and movement, drawing the eye away from any little imperfections.
If you went significantly shorter, see it as an opportunity to experiment. This is your chance to try out a chic half-up style, play around with different braids, or use some stylish clips and headbands. Even something as simple as a deep side part can completely change your look and hide any areas you're not thrilled with. The key is to own it with confidence while you wait for it to grow.
A fresh haircut is more than just a trim—it's a chance for your hair to look and feel its absolute best. The real magic happens in the aftercare. Protecting that sharp new look is what makes a good DIY cut a great one, and that's where the right products come in.
Think of them as the finishing touch that locks in the style and health of your freshly trimmed hair.
The very first thing you want to do after a cut is give those brand-new ends some love. Freshly snipped hair is at its healthiest, and your goal is to keep it that way for as long as possible. A good leave-in conditioner is perfect for this.
Our Morfose Milk Therapy Two Phase Conditioner is a fantastic choice. It lightly coats each strand, sealing the cuticle to lock out frizz and shield it from daily environmental stress. This simple step keeps your ends smooth and far less likely to split, which means your haircut looks sharper, longer.
The rise of at-home grooming is a trend that's here to stay. The COVID-19 pandemic really kickstarted the market for DIY haircut kits, changing how we all approach personal care. You can discover more insights about this trend on transparencymarketresearch.com.
If you use heat to style your new cut—whether it's a blow dryer, straightener, or curling iron—a heat protectant is completely non-negotiable. Applying heat to unprotected hair is one of the fastest ways to cause damage and split ends, pretty much undoing all your careful work.
The Morfose Heat Protector Spray creates a vital barrier between your hair and high temperatures, stopping moisture loss and preventing the kind of damage that leads to frizz.
For that perfect, polished finish, nothing beats a quality hair serum. Just a tiny amount of the Morfose Argan Hair Serum can tame any stray flyaways, fight off frizz, and add an incredible, light-reflecting shine. It makes your hair look instantly healthier and more vibrant, giving your DIY cut that professional, salon-finished feel without weighing it down.
After a trim, your hair is primed to absorb nutrients. Using a strengthening leave-in conditioner can make a significant difference. It helps reinforce the hair's structure from the inside out, promoting resilience against daily wear and tear.
For those whose hair needs an extra dose of strength, adding a keratin-based product to your routine is a game-changer. For example, our Morfose Keratin Leave-In Conditioner is designed to fortify each strand, making hair healthier and more manageable over time.
For guys looking to style their new trim, the right product is key for adding texture, hold, and definition. A quality hair wax is perfect for creating modern, structured looks that don't feel stiff or crunchy.
The Ossion series waxes, part of the Morfose men's line, offer fantastic hold with a natural-looking finish. Whether you're going for a messy, textured style or a sleek, combed-back look, these products give you the control you need to perfect your new cut.
So, you’ve learned the basics of cutting your own hair, but a few questions are probably still bouncing around in your head. That’s completely normal. Let’s tackle some of the most common things people wonder about before (and after) that first DIY trim.
There’s no single right answer here—it really comes down to your hair’s health and your goals. But there are some solid guidelines you can follow.
If you’re looking to maintain your current style and length, a trim every 6 to 8 weeks is the sweet spot. This keeps split ends from traveling up the hair shaft and makes sure your ends stay looking thick and sharp.
On the other hand, if you're trying to grow your hair longer, you can stretch that out. Aim for a tiny trim every 10 to 12 weeks. It might feel backward, but snipping off the oldest, most fragile ends prevents the kind of breakage that keeps you from gaining length.
Yes, you absolutely can! While creating a complex, salon-perfect layered cut takes a professional touch, there are fantastic, beginner-friendly methods that add beautiful movement and shape to your hair at home.
The "ponytail method" and the "twist-cutting" technique we talked about earlier are great for introducing soft, subtle layers without creating harsh, choppy lines. The golden rule is to start slow. You can always go back and cut more, but you can’t put hair back once it’s gone.
One of the biggest lessons in at-home hairstyling is learning to work with your hair's natural texture, not against it. A great cut embraces what you already have.
This is easily the most nerve-wracking part for most people, but the right mirror setup makes it totally doable. You’ll need two of them: your main bathroom mirror and a smaller handheld one.
The key here is patience. Work in very small, thin sections and use your fingers as a consistent guide to keep your line straight. It feels a little awkward at first, but you’ll get the hang of it pretty quickly. For any other common questions, our FAQs page is always there with quick answers.
A fresh cut is the perfect reset for your hair care routine. To keep those clean ends in great shape, you need to focus on deep conditioning. Your hair is much more receptive to moisture right after a trim.
Making a hair mask a weekly ritual will replenish hydration, fortify the hair cuticle, and keep your new style looking vibrant and feeling soft. This is your best defense against the return of split ends.
For the ultimate post-cut treatment, the Morfose Keratin Hair Mask is an excellent choice. Its powerful formula is designed to deeply penetrate the hair shaft, repairing damage and restoring elasticity. This mask leaves your freshly cut hair feeling silky, strong, and exceptionally healthy, preserving that salon-quality finish for weeks to come.
