Flash Sale 70% Off
Give customers details about the banner image(s) or content on the template.
Are You One of Our Winners?

Learning how to clean a hair brush is a quick, five-minute task that makes a surprisingly big difference in your hair's health and appearance. The process is simple: pull out trapped hair, wash the brush with shampoo and warm water, and let it dry completely. Making this a regular habit stops your freshly washed hair from getting greasy and is a huge win for maintaining a healthier scalp.
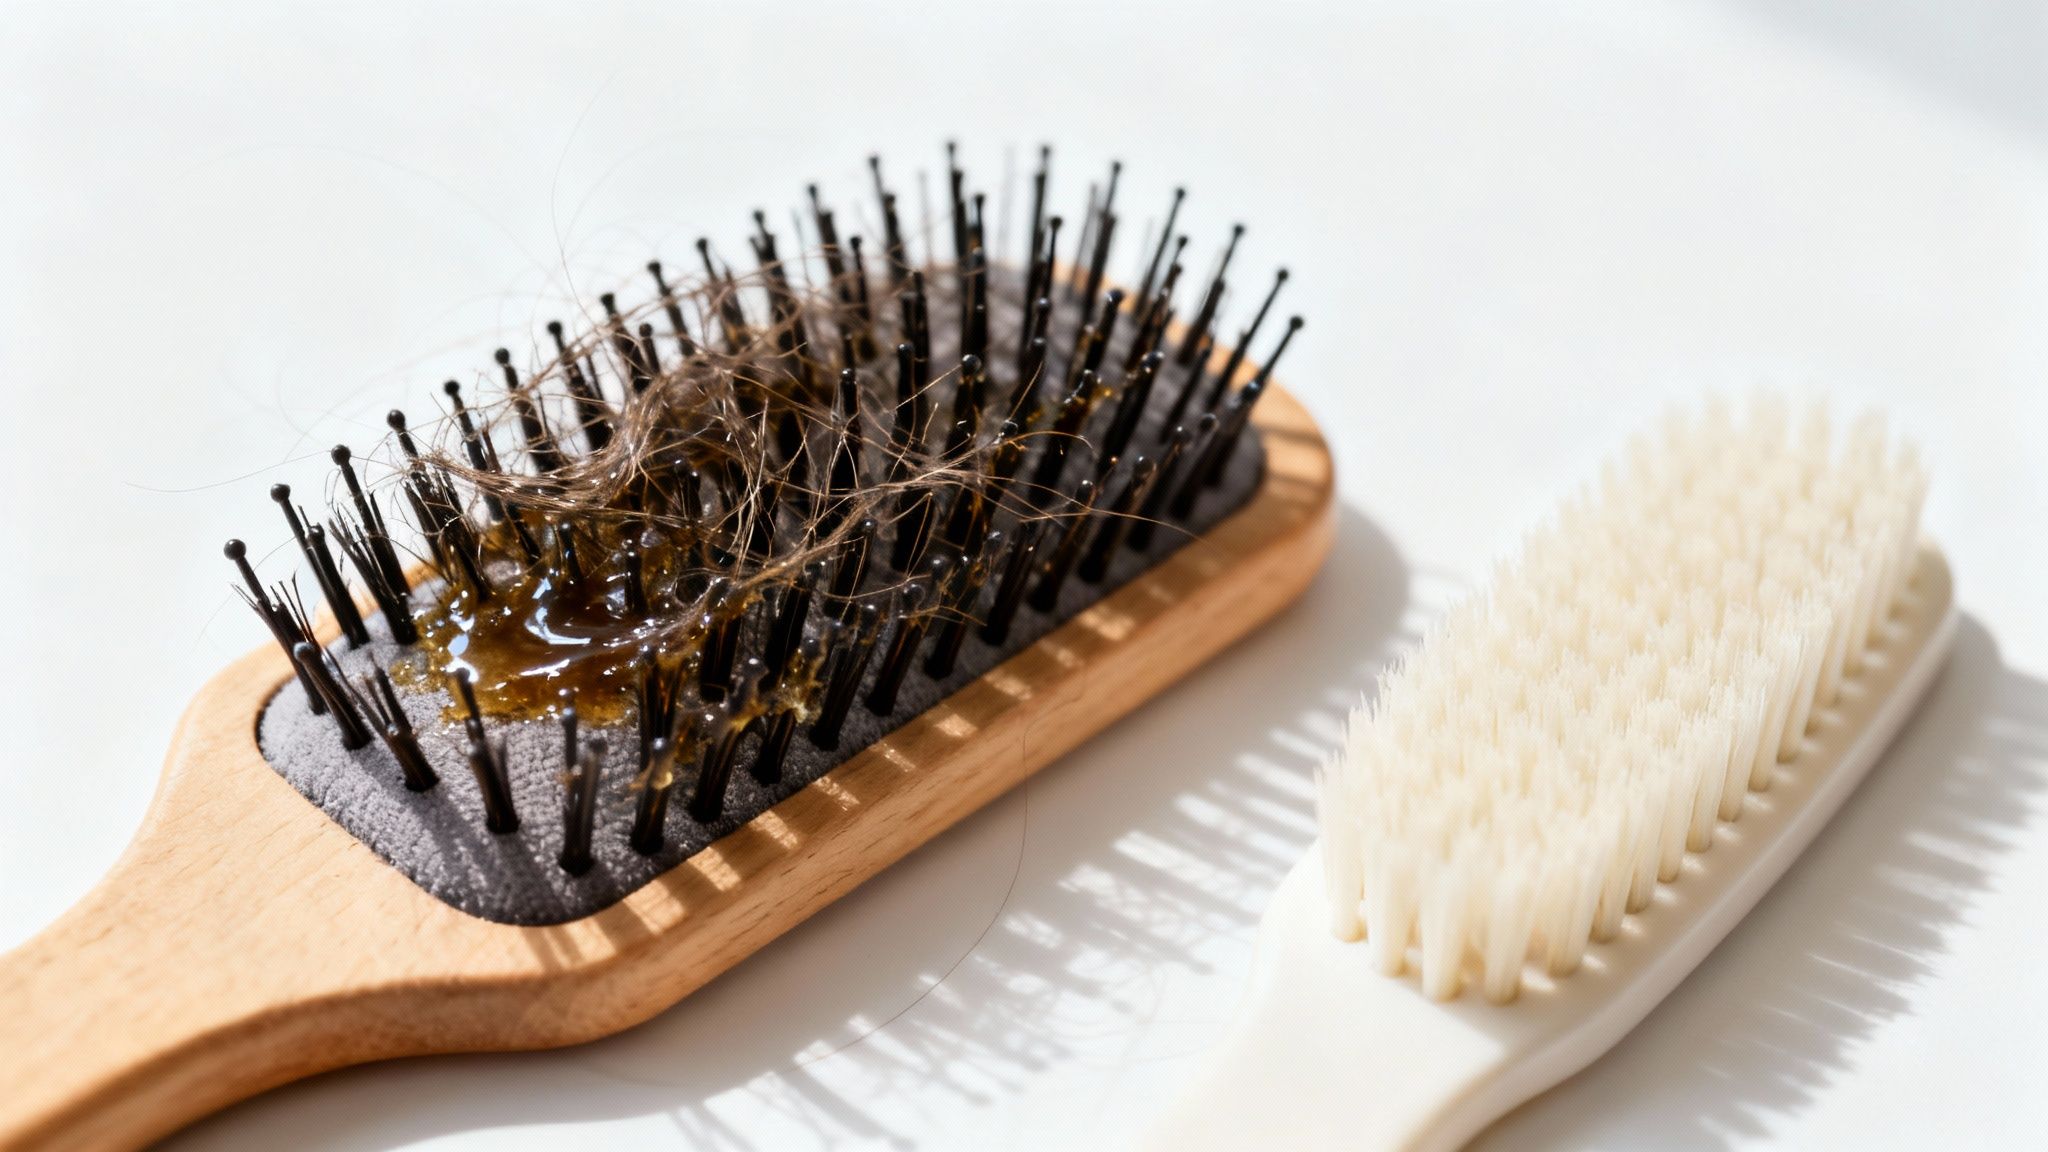
Let's be honest, cleaning your hairbrush probably isn't at the top of your to-do list. But what if you knew that a dirty brush actively works against your clean hair? Every time you run it through your strands, you’re redepositing a mix of old hair, scalp oils, dead skin cells, and sticky residue from styling products.
This buildup does more than just make your clean hair look greasy again. It can clog the bristles, making the brush less effective at detangling and distributing your scalp's natural oils. Over time, all that grime can even become a breeding ground for bacteria and yeast, which is the last thing you want near your scalp.
Transferring that bacteria back onto your head every day can lead to unwanted issues that get in the way of your hair goals. A clean brush, on the other hand, is a fundamental part of maintaining the healthy foundation your hair needs to thrive. For a deeper dive, check out our guide on the connection between scalp health and hair growth.
Using a dirty brush consistently can contribute to a few problems:
By making this a regular habit, you ensure your brush is helping your hair care routine, not hurting it. A clean brush means cleaner hair, a healthier scalp, and much better results from your favorite products.
Before you can get your hair brushes squeaky clean, you need to have the right supplies on hand. Having everything laid out ahead of time makes this chore feel less like a drag and more like a quick, satisfying refresh. The good news is you probably have everything you need already, so no special shopping trip is required.
The process starts with the "dry clean"—manually getting all that trapped hair out. You absolutely cannot skip this part. Pulling out all the shed strands first makes the actual washing step a million times more effective.
To get at those stubborn, tangled bits of hair and lint, you need something with precision. A few simple tools can make a world of difference in getting the base of your brush completely clear.
Once the hair is gone, it's time to tackle the gunk: the oil, product buildup, and general grime. This is the part where you dissolve all that residue that's been making your hair look dull.
The wet-cleaning stage is all about a good soak to break down buildup, followed by a gentle scrub to get rid of anything left behind.
Pro Tip: Your regular shampoo is one of the best cleaners for your hairbrush. It’s designed to break down the exact scalp oils and styling products that are caked onto the bristles.
For this deeper wash, you'll want to grab a few things:
Here's a quick look at how common household cleaners stack up against commercial products.
Deciding what to use for the "wet clean" phase often comes down to what you have on hand. Both routes have their pros and cons.
| Cleaning Solution | Best For | Pros | Cons |
|---|---|---|---|
| Gentle Shampoo | All brush types (except untreated wood) | Inexpensive, readily available, formulated to remove hair products and oils. | May not be strong enough for extreme, caked-on buildup. |
| Baking Soda & Water | Deodorizing and scrubbing synthetic brushes | Natural, great for absorbing odors, provides gentle abrasion for scrubbing. | Can be messy; might leave a slight residue if not rinsed well. |
| White Vinegar & Water | Disinfecting plastic or ceramic brushes | Natural disinfectant, effective at breaking down mineral buildup from hard water. | Strong smell; can be too harsh for natural bristles or wood. |
| Commercial Brush Cleaner | Deep cleaning and sanitizing all brush types | Formulated for the job, often includes sanitizing agents, very effective. | More expensive, requires a separate purchase. |
Ultimately, for routine cleaning, shampoo and warm water do the trick beautifully. If you're dealing with a seriously neglected brush or want a true deep-sanitizing clean, a commercial cleaner or a vinegar soak might be a better choice.
By getting this simple kit together, you’re all set for a professional-level clean at home. Having the right equipment is just as important as the technique itself, a concept we explore in our guide to the essential tools for hair repair.
Alright, let's get to the satisfying part—bringing your brushes back to life. This proven four-part method is my go-to for most synthetic, plastic, or ceramic brushes. Follow these steps, and they'll look almost brand new. We'll break down each phase to keep things simple and effective.
First, you have to tackle the Dry Removal. Before any water touches your brush, you must get every last strand of loose hair out. Use the tail end of a pintail comb or a pair of tweezers to lift and pull out all the tangled hair from the base of the bristles. Don't rush this part; a clean base makes the washing step so much more effective.
Next, mix a simple but powerful Soaking Solution. Grab a bowl or plug your sink and fill it with warm water—not hot, as extreme temperatures can melt glue or warp plastic.
Add a few drops of a gentle, clarifying shampoo to the water and swish to create a sudsy bath. Shampoo is designed to break down the exact oils and product gunk caked onto your brush, making it the perfect cleaning agent. It's a much safer bet than harsh household cleaners.
Of course, keeping your brush cleaner for longer starts with clean hair. Making sure you're washing properly reduces the buildup that gets transferred in the first place. For more on that, check out our guide on how to properly wash your hair.
This decision tree gives you a quick visual on the best cleaning approach depending on your brush's material.
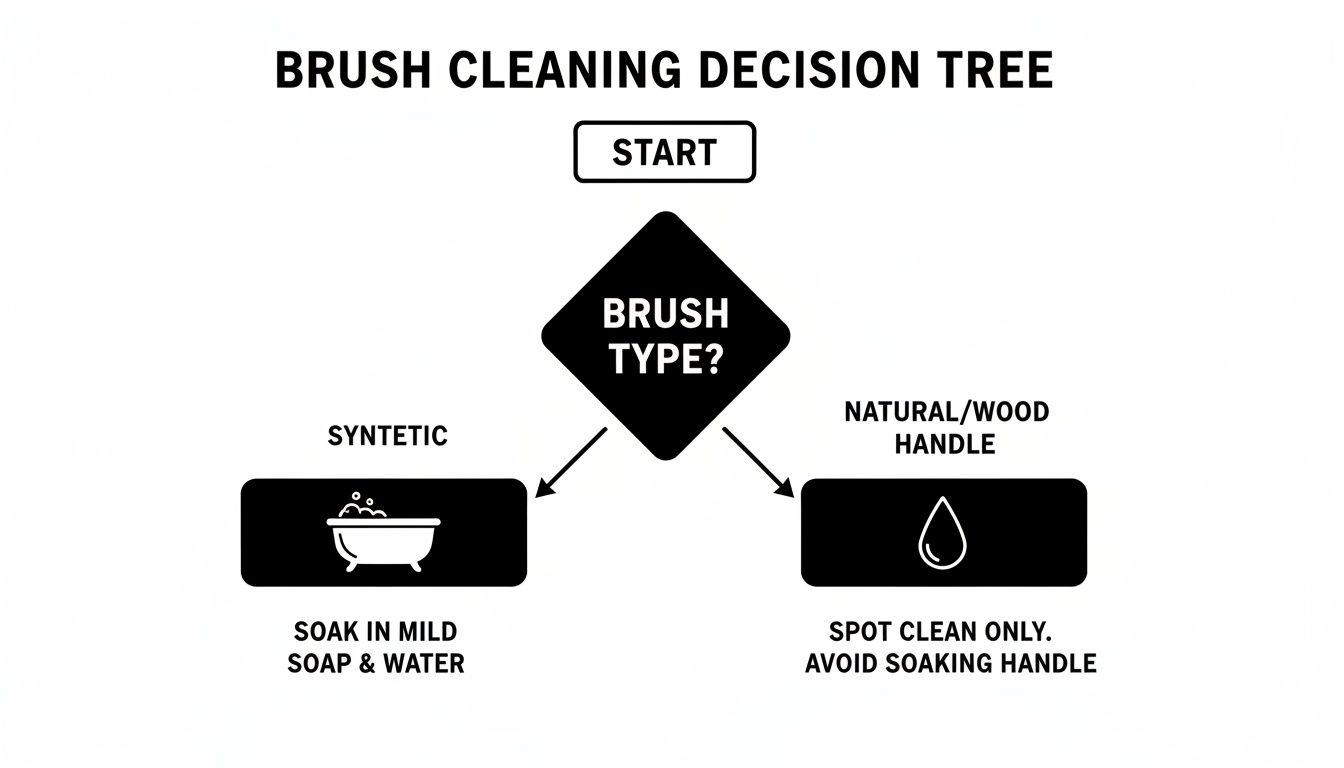
As the flowchart shows, synthetic brushes can handle a full soak. Natural materials, on the other hand, need a more delicate, low-water approach to prevent damage.
After letting the brush soak for about 10-15 minutes, it’s time for the Deep Scrub. Grab an old, clean toothbrush and gently scrub between the bristles and across the cushion pad. This dislodges any remaining grime, dust, and stubborn product buildup that the soak helped loosen.
Finally, nail the Rinse and Dry technique. Run the brush under cool, running water until every bubble is gone. Give it a gentle shake to get rid of excess water.
Crucial Tip: Always place your brush bristle-side down on a clean towel to air dry. This lets water drain away from the cushion pad. If moisture gets trapped inside, it can cause mildew or weaken the glue. Let it dry completely for at least 12-24 hours before you use it again.
Wooden and natural boar bristle brushes are an investment, and they need different care than their plastic counterparts. The absolute worst thing you can do is submerge them in water, as this can cause the handle to swell, crack, or warp. The trick is to use a gentle, ‘low-water’ method to get them clean without causing damage.

This technique skips the full soak entirely. First, get all the loose hair out, just like you would with any other brush. Next, grab a clean cloth, dampen it with warm water and just a single drop of gentle shampoo, and then wring it out until it’s almost dry.
With your barely-damp cloth, carefully wipe down the wooden handle and the cushion pad. The goal is to clean the surface, not saturate it. When it comes to the natural bristles, you’ll want to use a quick dip-and-swish approach.
It's crucial to keep the wooden base and handle completely dry during this step. A natural boar bristle brush will soak up moisture, which can ruin the delicate bristle structure.
As soon as you’re done cleaning, place the brush with the bristles facing down on a dry towel in a well-ventilated area. This allows water to drain away from the wood and cushion, preventing damage and helping your high-quality tools last for years to come.
Once you’ve put in the work to get your hair brush sparkling clean, the last thing you want is for it to get gunked up again right away. The secret to preventing that buildup often lies in your product cabinet. Heavy, sticky styling formulas are the number one reason brushes get clogged with that gross, hard-to-remove residue.
Making a conscious switch to lightweight, high-quality styling products is the easiest way to keep your tools cleaner for longer. These formulas are designed to do their job—hold a style, detangle, add shine—without leaving behind a greasy film or flaky buildup. This simple change means future cleaning sessions will be a breeze.
For a flexible hold that won't feel heavy or turn into a sticky mess, the Morfose Ossion Hair Wax is a fantastic option. It gives you texture and control but doesn't flake, which dramatically cuts down on the white residue that gets trapped between bristles.
If you rely on a daily detangler, check out the Morfose Milk Therapy Two Phase Conditioner. It’s a super-light leave-in spray that conditions and smooths without weighing hair down, so you get all the benefits without the oily film that makes brushes feel greasy.
By choosing smarter products for your daily routine, you create a healthier cycle for your hair and your tools. Your brush stays cleaner, your hair looks better, and you spend way less time dealing with maintenance. To learn more, take a look at our guide on choosing the right hair care products.
Even with a solid cleaning game plan, you might still have a few questions. Let's tackle some of the most common ones that pop up when it comes to keeping your hair brushes in pristine condition.
The ideal cleaning schedule really comes down to your habits. A great rule of thumb is to pull out any trapped hair after each use. It only takes a second and makes a huge difference in preventing serious buildup.
When it's time for a deeper, wet clean, here’s what we recommend:
For more personalized advice, our FAQs page has a ton of extra hair care tips.
While it might work on a super oily plastic brush in a pinch, dish soap is generally too harsh for the job. It can strip the protective finish off wooden handles and leave natural bristles feeling brittle and dry. Your best bet is always a gentle shampoo, as it’s made to dissolve the exact kinds of oils and product residue on your brush without being overly aggressive.
Those stubborn little gray flecks of dust and lint can feel impossible to get rid of. After you've pulled out all the hair, grab an old, clean toothbrush, dip it into your soapy water, and use it to scrub the base of the brush. The fine bristles are perfect for getting right down to the cushion and scrubbing away those tiny particles.
At Morfose, we know that healthy hair starts with the right tools working with the right products. Keeping your brushes clean is a non-negotiable step that ensures our formulas can deliver their best results, every single time you style your hair.
