Flash Sale 70% Off
Give customers details about the banner image(s) or content on the template.
Are You One of Our Winners?

Using a hair toner is the secret weapon for getting rid of stubborn brassy, yellow, or orange tones that can appear after lightening your hair. It’s the essential final step that neutralizes unwanted warmth, giving you the clean, professional-looking color you were actually aiming for.
The process is straightforward: you mix a pigmented toner with a developer, apply it to damp, pre-lightened hair, and let it process for a short time. Once you rinse, you’ll reveal a beautifully balanced, salon-quality blonde, silver, or pastel shade. Mastering how to use hair toner is the non-negotiable step for achieving flawless color at home.
If you've ever bleached your hair, you know that moment when it lifts to a shade of yellow or orange that was definitely not on the box. Don't panic! This is completely normal. Raw, lightened hair almost always has underlying warm pigments that need to be corrected.
A toner is the essential follow-up that turns that unwanted brassiness into the cool, neutral, or delicate shade you wanted from the start.
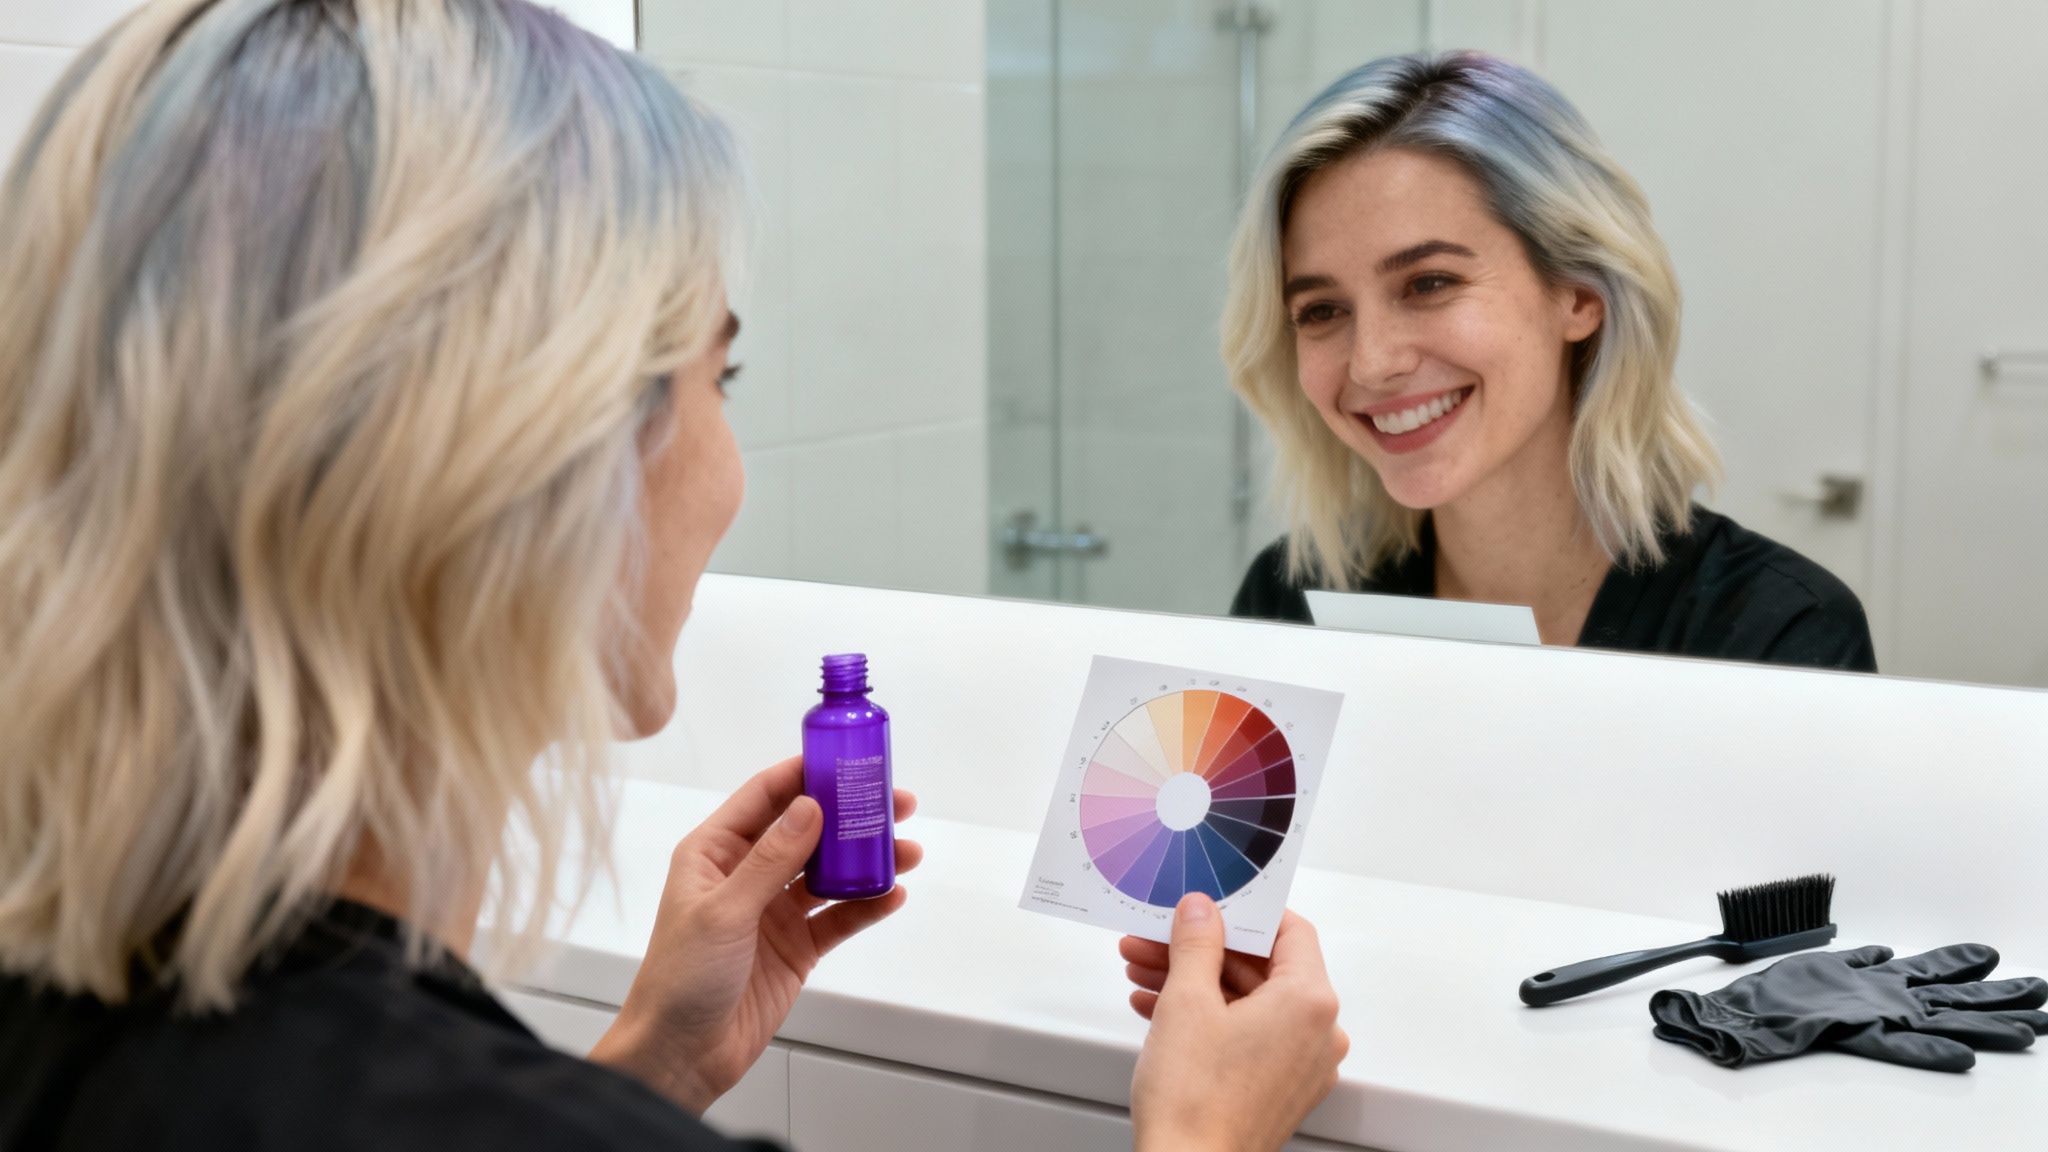
To understand how toner works, you just need a quick refresher on color theory. The color wheel shows that colors on opposite sides cancel each other out. It's that simple.
This is the entire secret behind a perfect toning job. You aren't actually dyeing your hair a new color; you're just applying a sheer veil of the opposite shade to create a beautifully balanced, neutral finish.
To make it even easier, here’s a quick reference chart.
| If Your Hair Looks... | You Need a Toner With This Base... | To Achieve This Look... |
|---|---|---|
| Pale Yellow (Like the inside of a banana peel) | Violet/Purple | Cool, Platinum, or Icy Blonde |
| Brassy Yellow-Orange (Like a gold coin) | Blue-Violet | Neutral or Natural Blonde |
| Orange (Like a bright orange) | Blue | Cool Ash Blonde or Brown |
Just find the color you're seeing in your hair, and the chart will point you to the right toner base to get the job done.
With the boom in at-home hair coloring, toner has become an absolute must-have in every DIY colorist's toolkit. As more of us learn to bleach and highlight our own hair, understanding how to use hair toner properly is the key to getting it right.
The global hair color market is expected to jump from USD 26.1 billion to a massive USD 43.3 billion by 2033, which just goes to show how many people are taking color into their own hands. You can read more about the hair color market's massive growth if you're curious.
Salons have known this secret for years. Professional data consistently shows that up to 70–80% of blonding services are finished with a toner or gloss. Why? Because it's the only way to refine that raw, lifted hair into a gorgeous, finished look.
By mastering the toning process, you can achieve that same polished, expensive-looking finish without ever leaving your house. This guide will walk you through every single detail—from picking the right products to the final rinse—so you can turn a complicated salon secret into your own easy routine for flawless color.
And remember, getting the perfect tone is only half the battle. Maintaining it with a solid aftercare routine, like using a great color-safe shampoo, is the ultimate key to keeping your color fresh and vibrant.
Choosing the right toner and developer is where the magic happens. This is the single most important step for achieving that flawless, expensive-looking blonde and kicking brass to the curb for good. Let's break down exactly what you need to look for.
The secret to toning comes down to one thing: the color wheel. To cancel out a color, you use its opposite. Before you can pick a toner, you have to correctly identify the color you're trying to neutralize in the mirror.
The best way to do this is to grab a section of your lightened hair and hold it against a plain white piece of paper or a white towel. Make sure you're in good, natural light—bathroom lighting can lie! Now, what color do you see?
Key Takeaway: This isn't a step you can guess on. Using a purple toner on orange hair just won’t cut it, and you'll be left disappointed. On the flip side, putting a strong blue toner on pale yellow hair can leave you with a muddy, swampy-greenish mess. Match the tool to the job!
Developer is what activates your toner. It gently opens the hair cuticle so the toner's color molecules can get in and do their job. Picking the right strength—or "volume"—is non-negotiable for getting the color you want without damaging your hair. You'll mostly see 10 volume and 20 volume used for toning.
10 Volume Developer
This is your holy grail for most toning situations. It's the gentlest choice and provides deposit-only color. That means it won't lighten your hair any further; it only deposits the toning pigments needed to neutralize brass.
20 Volume Developer
This one has a bit more muscle. A 20 volume developer will give you about one level of lift while it deposits the toner. It has its place, but it also comes with a higher risk of damage if your hair isn't up for it.
For almost all at-home toning, please stick with a 10 volume developer. It’s the safest bet for a gorgeous, even result without causing any extra stress to your hair.
You’ll see toners in two main forms: liquid and cream. They both achieve the same result, but the application is totally different.
Liquid Toner
Cream Toner
So, which one is for you? If you’re doing a simple, all-over tone, a liquid toner is fast and effective. But if you’re aiming for a more detailed, professional-looking result on specific sections, a cream toner gives you the control you need.
Great results start with solid prep, and this is especially true when it comes to toning hair. Patchy color or unnecessary damage often happens because this crucial first stage was rushed. A little patience now pays off big time with a gorgeous, even result later.
Before you even think about mixing toner, run through this quick pre-flight checklist. This is all about making sure your hair is in the best possible shape to receive the color, setting you up for that professional-looking finish while keeping your hair healthy.
It’s tempting to go straight from bleaching to toning, but hitting pause is one of the kindest things you can do for your hair. Right after a lightening session, your hair is at its most fragile and vulnerable.
Giving it a rest for 24 to 48 hours lets the hair cuticle calm down and settle. It also gives your scalp’s natural oils a chance to come back and form a protective barrier. This little break makes a massive difference in preventing over-processing and breakage. If you want a deep dive into the lightening process, our guide on how to bleach hair at home has you covered.
This is the one step you absolutely cannot skip. A strand test isn’t just about checking for an allergic reaction; it's your crystal ball. It shows you exactly how the final color will look and, more importantly, helps you nail the perfect processing time.
Expert Tip: The strand test is your secret weapon against over-toning. Porous hair can grab color incredibly fast. A shade that takes 10 minutes to develop on one person might only need 3 minutes on your hair. This test removes all the guesswork.
Healthy hair doesn't just look better; it tones more evenly and holds onto color for longer. Lightening and toning are a chemical tag team that puts hair under significant stress. This is exactly why bond builders and reparative treatments are no longer just a salon luxury but a standard part of any smart at-home hair color routine.
In fact, the global market for hair bond multipliers is projected to grow from USD 213.5 million to USD 358.6 million by 2035. For anyone with dry or damaged hair, this just underlines how vital it is to use a bond-building or protein-rich treatment before and after toning. You can find more insights on the rise of bond-building hair care.
Start with a clean canvas. Wash your hair with a clarifying shampoo a day or two before you plan to tone. This gets rid of any product buildup or hard water minerals that could block the toner from working its magic.
Follow that up with a deeply nourishing treatment. A protein-rich mask infuses your strands with the strength and moisture they need to handle the chemical service beautifully.
You've done the prep work, your hair is ready, and now it's time for the main event. Mastering the application is all about getting the technique and timing just right. Follow these clear, practical steps to help you get that flawless, salon-fresh look every single time.
First things first, let's get your workstation set up. You don't want to be scrambling for supplies with toner-covered gloves.
Before you start mixing, lay out all your tools on a protected surface. Having everything within arm's reach makes the whole process smoother and less stressful.
Once your station is ready, you're set to start mixing.
This visual guide breaks down the essential prep stages you need to complete before you even start mixing, setting you up for a clean and effective toning session.
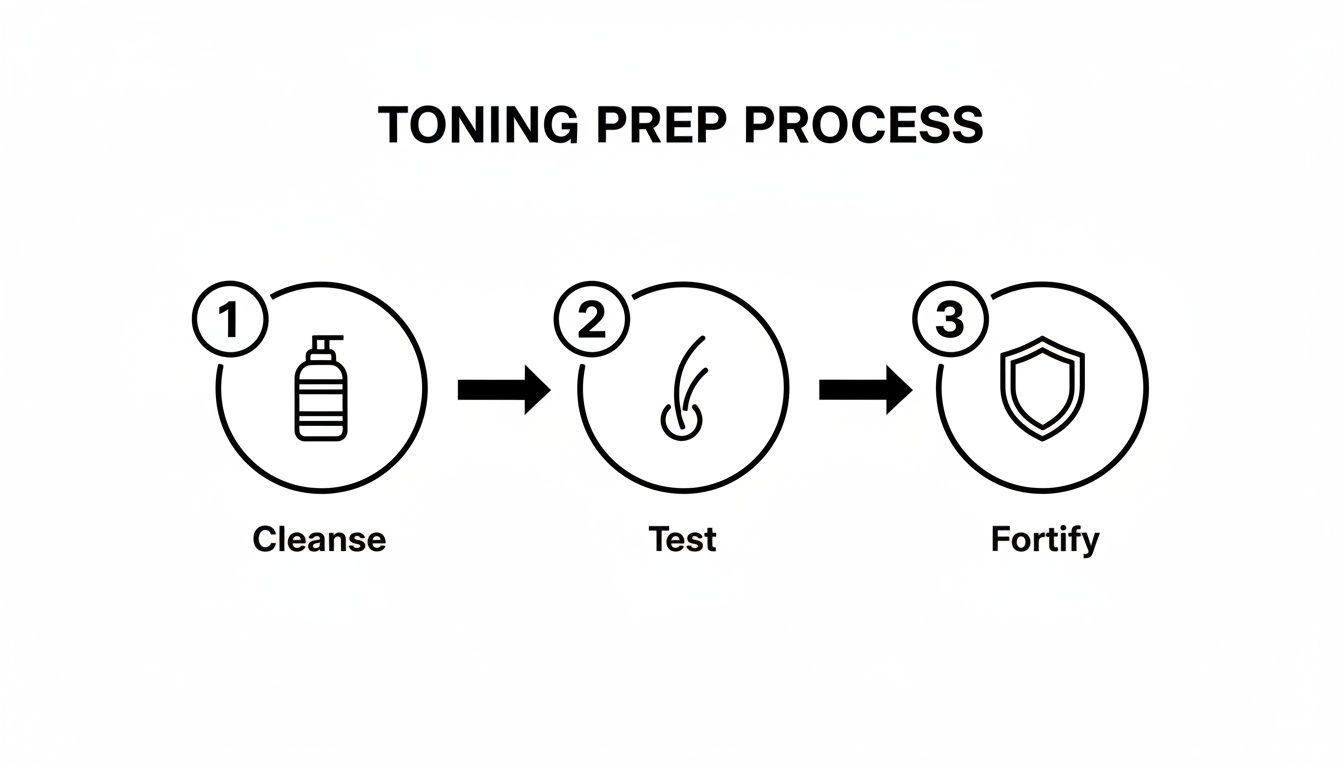
Following these steps—cleansing away product buildup, doing that all-important strand test, and fortifying your hair—creates the ideal canvas for beautiful, even results.
That ratio of toner to developer on the box? It's not a suggestion—it's a rule. Getting this part wrong can lead to unpredictable results, so always double-check the manufacturer's instructions.
Most toners call for a 1:2 ratio, which means one part toner to two parts developer. So, if you use 1 ounce of toner, you'll mix it with 2 ounces of developer. Use the measurement lines on your mixing bowl or bottle for accuracy.
Pour the developer into your non-metallic bowl first, then add the toner. Use your tint brush to whisk them together until the mixture is completely smooth with a consistent, lump-free texture.
Alright, your toner is mixed and it's go-time. The goal here is even saturation, and the best way to achieve that is by working in clean, organized sections.
Section Your Hair
Start with clean, towel-dried hair that’s about 70-80% dry—so, damp but not dripping wet. Use your clips to divide your hair into four equal quadrants: two in the front and two in the back. This makes the whole process so much more manageable.
Start Where You Need It Most
Begin applying the toner to the section of your hair that is the most brassy. For many people, this is the mid-lengths and ends, which might not have lifted as cleanly as the hair closer to the scalp.
However, if you're dealing with "hot roots"—where the hair near your scalp is warmer than the rest—you'd start there instead. Understanding how to manage these tricky spots is crucial, and you can learn much more in our detailed guide on how to fix brassy hair after bleaching.
Pro Tip: Try applying the toner about a half-inch away from your scalp at first. The heat from your head can make the toner process faster at the roots. You can go back and apply it to the root area during the last few minutes for a seamless blend.
Work through your hair in small, quarter-inch to half-inch sub-sections. Use your tint brush to fully saturate the hair from roots to ends. Once one quadrant is totally covered, clip it back up and move on to the next one, repeating the process until every strand is coated.
This is where that strand test you did earlier becomes invaluable. You should already have a good idea of how long your hair needs. Set a timer, but more importantly, keep a close eye on your hair.
You will physically see the toner's color develop—don't panic if you see a shade of purple or blue! That's just the pigment doing its job and neutralizing the yellow or orange tones. It will all rinse out.
Check a small piece of hair every 3-5 minutes by gently wiping it with a gloved finger to see the underlying tone. Most toners fully process within 10 to 20 minutes. The second your hair reaches that perfect, cool, balanced shade you're aiming for, it's time to rinse immediately. Don't wait for the timer to go off if your hair looks ready sooner.
Congratulations! You successfully toned your hair and achieved that perfect, brass-free shade. The hard part is over, but now the mission shifts to protecting that gorgeous new color. Think of your toned hair as an investment. A smart aftercare routine is the best way to make sure it stays vibrant for as long as possible.
Freshly toned hair is delicate. How you treat it in the weeks following your service directly impacts how long the color lasts. Aggressive washing, high heat, and even the sun can strip those toner pigments right out, sending your beautiful work down the drain way too soon.
Your post-toning routine doesn't need to be complicated, but it does need to be consistent. Just a few simple swaps and new habits will make a world of difference in preserving your color and maintaining the health of your hair—which is critical after any chemical process.
Sulfate-Free Is the Only Way
Sulfates are harsh detergents in many shampoos that create a rich lather. While they clean well, they’re notorious for stripping color and moisture. Switching to a sulfate-free, color-safe shampoo is the single most important change you can make. These gentler formulas cleanse without aggressively fading your toner.
Deep Conditioning Is a Must
Toning, especially after bleaching, can leave hair feeling thirsty and fragile. A weekly deep conditioning treatment is non-negotiable. It restores moisture and rebuilds strength. Look for masks rich in proteins and amino acids to put back what the chemical process took out, leaving your hair soft, resilient, and better able to hold onto color.
Beyond your shampoo and conditioner, your daily habits play a massive role in color longevity. You might be sabotaging your toner without even realizing it.
Here are the top culprits to watch out for:
Protecting your color is a huge part of hair care today. The global haircare market is projected to grow from USD 96.7 billion to USD 128.7 billion by 2034. Why? Because people are investing in their color and want it to last. Salon data shows that things like hot water and heat styling can fade toner in just 2–3 weeks, while a good routine can extend results to 4–6 weeks or more.
By adopting these simple habits, you can dramatically extend the life of your toner. For an even deeper dive into color preservation, check out our guide on how to make hair color last longer.
Ultimately, great hair care is about more than just color. It’s essential to address the bigger picture to ensure overall vitality, which includes finding effective solutions for hair health.
You’ve done the hard part—you’ve toned your hair to that perfect, envy-inducing shade. Now, how do you keep it looking like you just stepped out of the salon? The secret is shifting from correction to preservation. Your hair care routine is your insurance policy for that beautiful color.
Chemically treated hair needs extra love, and using a dedicated system is the best way to lock in your tone while keeping your strands healthy and resilient.
To keep your color looking fresh and your hair feeling amazing, think of your routine as a team of specialists. Each product has a job to do in protecting and repairing your hair.
Gentle Cleansing: First things first, ditch the harsh shampoos. The Morfose Color-Safe Sulfate-Free Shampoo is your new best friend. It cleans your hair and scalp without aggressive detergents that can send your toner right down the drain. This is non-negotiable for making your color last.
Deep Replenishment: Any chemical service is going to leave your hair thirsty for moisture and protein. This is where a serious treatment comes in. The Morfose Milk Therapy Hair Mask is a powerhouse of hydration, working deep to restore softness and strength.
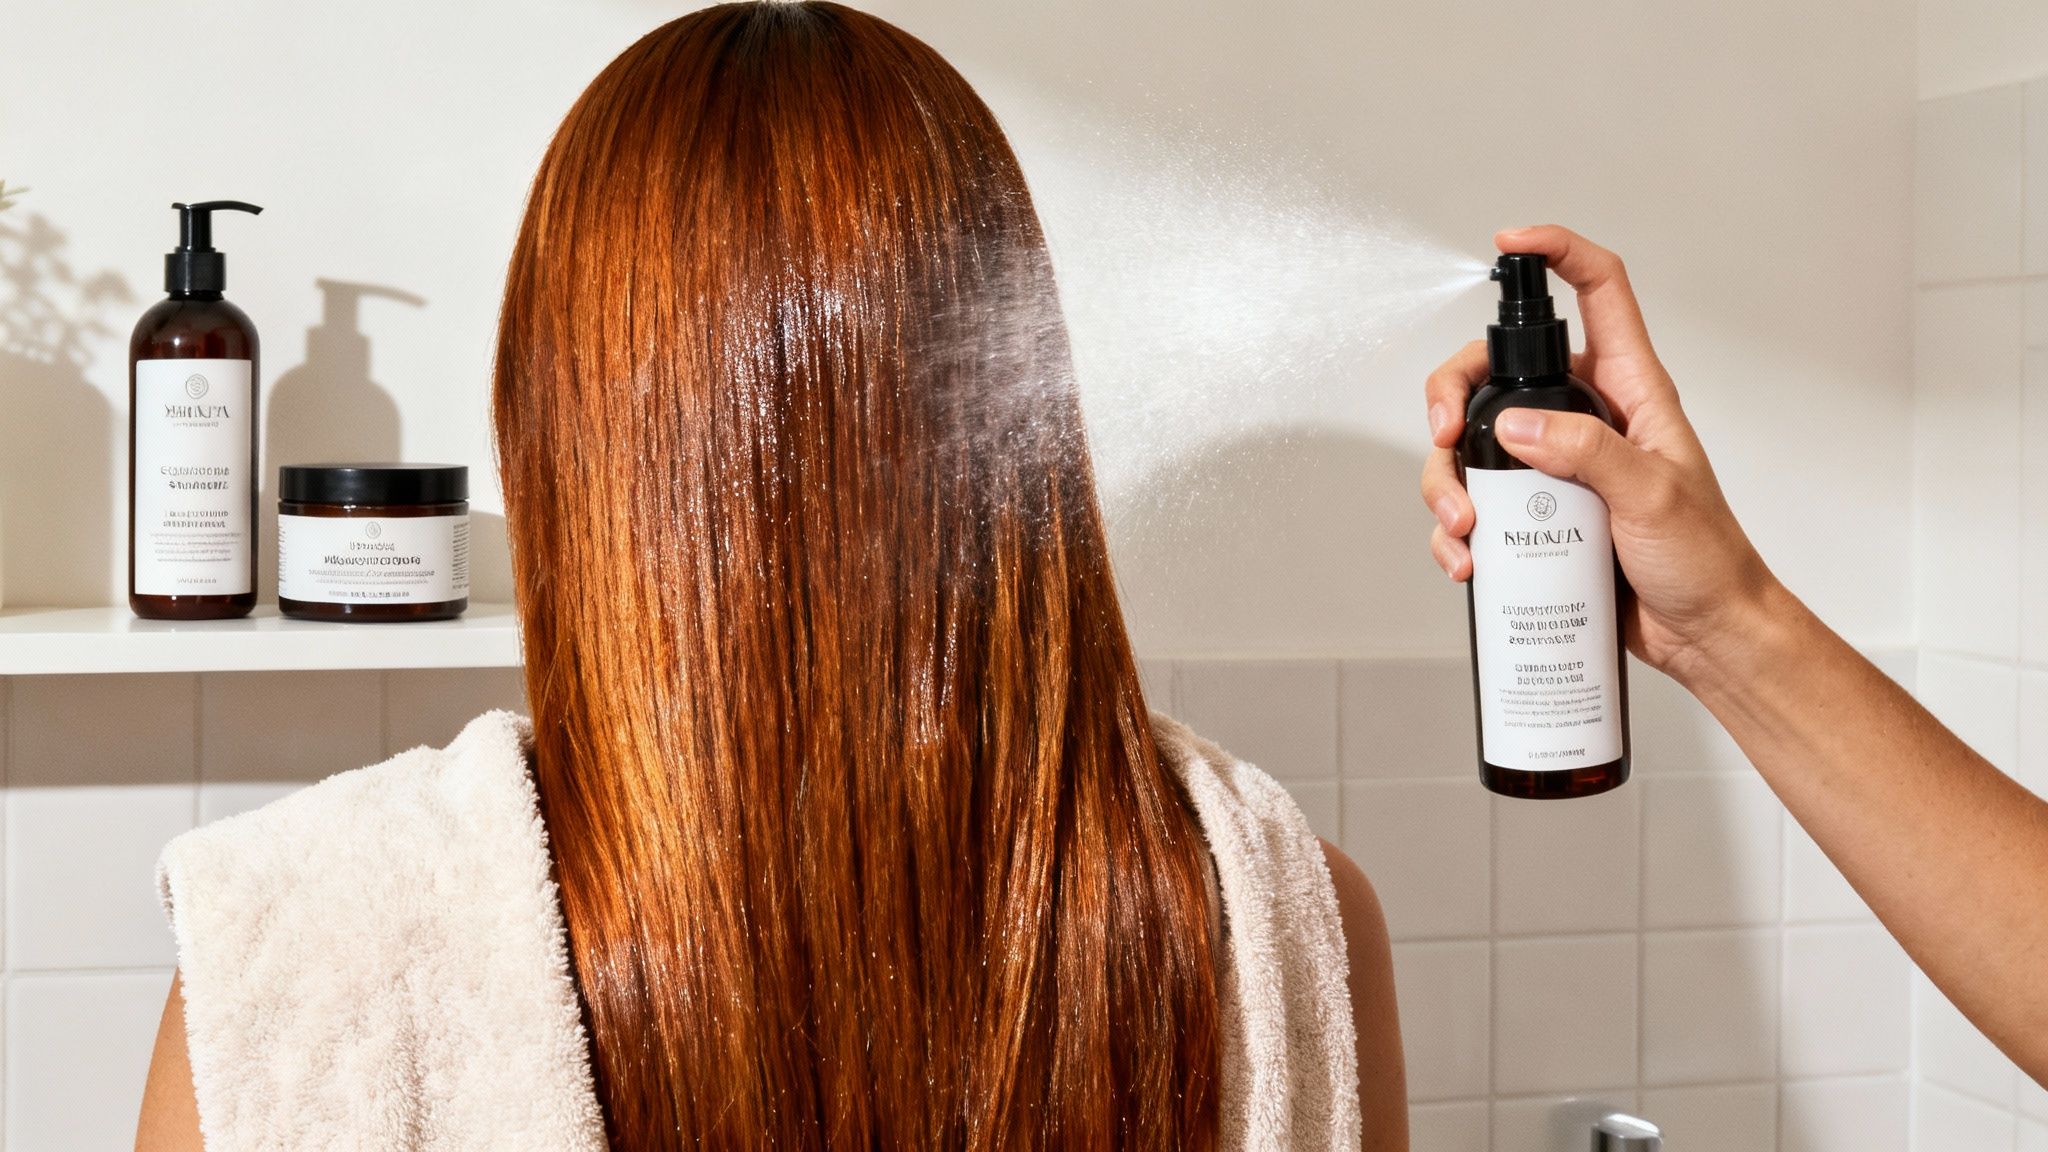
Essential Heat Defense: Heat styling is one of the quickest ways to dull your toner. Don't even think about picking up a blow dryer or flat iron without first protecting your strands. A few spritzes of the Morfose Heat Shield Spray create a barrier that helps prevent heat damage and stops your color from fading.
Frizz Control and Shine: For that smooth, polished finish, a little bit of the Morfose Argan Hair Serum goes a long way. It tames frizz, seals the cuticle to lock in moisture, and adds a gorgeous, healthy-looking shine.
Looking for a way to fight brassiness between full toning sessions? A good toning shampoo can be a game-changer. If you want to learn more, our guide to the Morfose Ossion Toning Shampoo breaks down how it works to keep yellow tones at bay with every wash.
Even after you’ve got the basics down, a few questions always seem to pop up when you're toning your hair at home. That's totally normal! Getting these details ironed out is often what separates a decent toning job from a truly flawless, professional-looking result.
Let's clear up some of the most common uncertainties to help you tone with total confidence.
This is easily the number one question, and the honest answer is: it depends. There’s no single magic number, but a great starting point for most people is to refresh your toner every 4 to 6 weeks.
Of course, your hair and your habits will move that timeline. Here’s what makes a difference:
To keep your color looking fresh between full toning sessions, a color-depositing product is your best friend. Using a purple or blue shampoo just once a week can work wonders to kick out any brassiness that starts creeping back in.
In a word, no. Toners are designed to work on hair that’s already been lightened. Think of toner as a translucent color glaze; its job is to adjust the undertone of blonde or pre-lightened hair, not to lift or change the color of dark hair.
If you put a standard toner on dark brown or black hair, you simply won’t see a difference. It can't lift the dark pigment. However, this is where it gets interesting for brunettes with lighter pieces.
If you're a brunette with balayage or highlights, toner is absolutely essential! You’ll just apply it only to the pre-lightened sections. This is the secret to refining those pieces into the perfect caramel, cool ash brown, or sandy beige you were going for.
We’ve all been tempted to leave a product on a little longer, thinking it’ll work better. With toner, that’s a mistake. Leaving toner on past the recommended time can cause it to over-deposit, meaning your hair grabs way too much of the toner's base pigment.
For instance, if you leave a violet-based toner on very pale yellow hair for too long, you risk your hair turning a lavender or even a dull gray color. This is exactly why doing a strand test isn't just a suggestion—it's the critical step that tells you the perfect processing time for your specific hair before you apply it all over.
It's smart to be aware of how different products affect your hair. If you want to dive deeper into the science of it, we have a whole article on whether toner damages your hair.
While it might sound convenient, you really want to avoid applying toner to dry hair. There's a good reason why almost every professional and at-home toner instructs you to apply it to clean, towel-dried (damp) hair.
Damp hair allows the toner to spread smoothly and evenly, which is key to avoiding a splotchy, patchy result. Dry hair can be like a sponge, soaking up the product way too quickly in some spots while leaving other areas untouched. For the best, most consistent outcome, always stick to the instructions on the box.
For a complete system that protects your new color and deeply nourishes your hair, Morfose delivers the salon-quality results you want at home. Check out our color-safe collection to keep your beautifully toned hair vibrant, shiny, and healthy.
