Flash Sale 70% Off
Give customers details about the banner image(s) or content on the template.
Are You One of Our Winners?

Let's be honest, the first sign your flat iron needs a good clean is when it starts snagging your hair or leaving behind that faint, burnt smell. We’ve all been there. The culprit is almost always a sneaky layer of product buildup from heat protectants, serums, and hairsprays.
Every time you prep your hair for heat styling, a tiny bit of product gets baked onto the plates. Over time, this residue turns into a sticky, grimy film that completely sabotages your styling efforts and can even damage your hair. This guide will walk you through the simple, step-by-step process of how to clean your hair straightener safely and effectively.
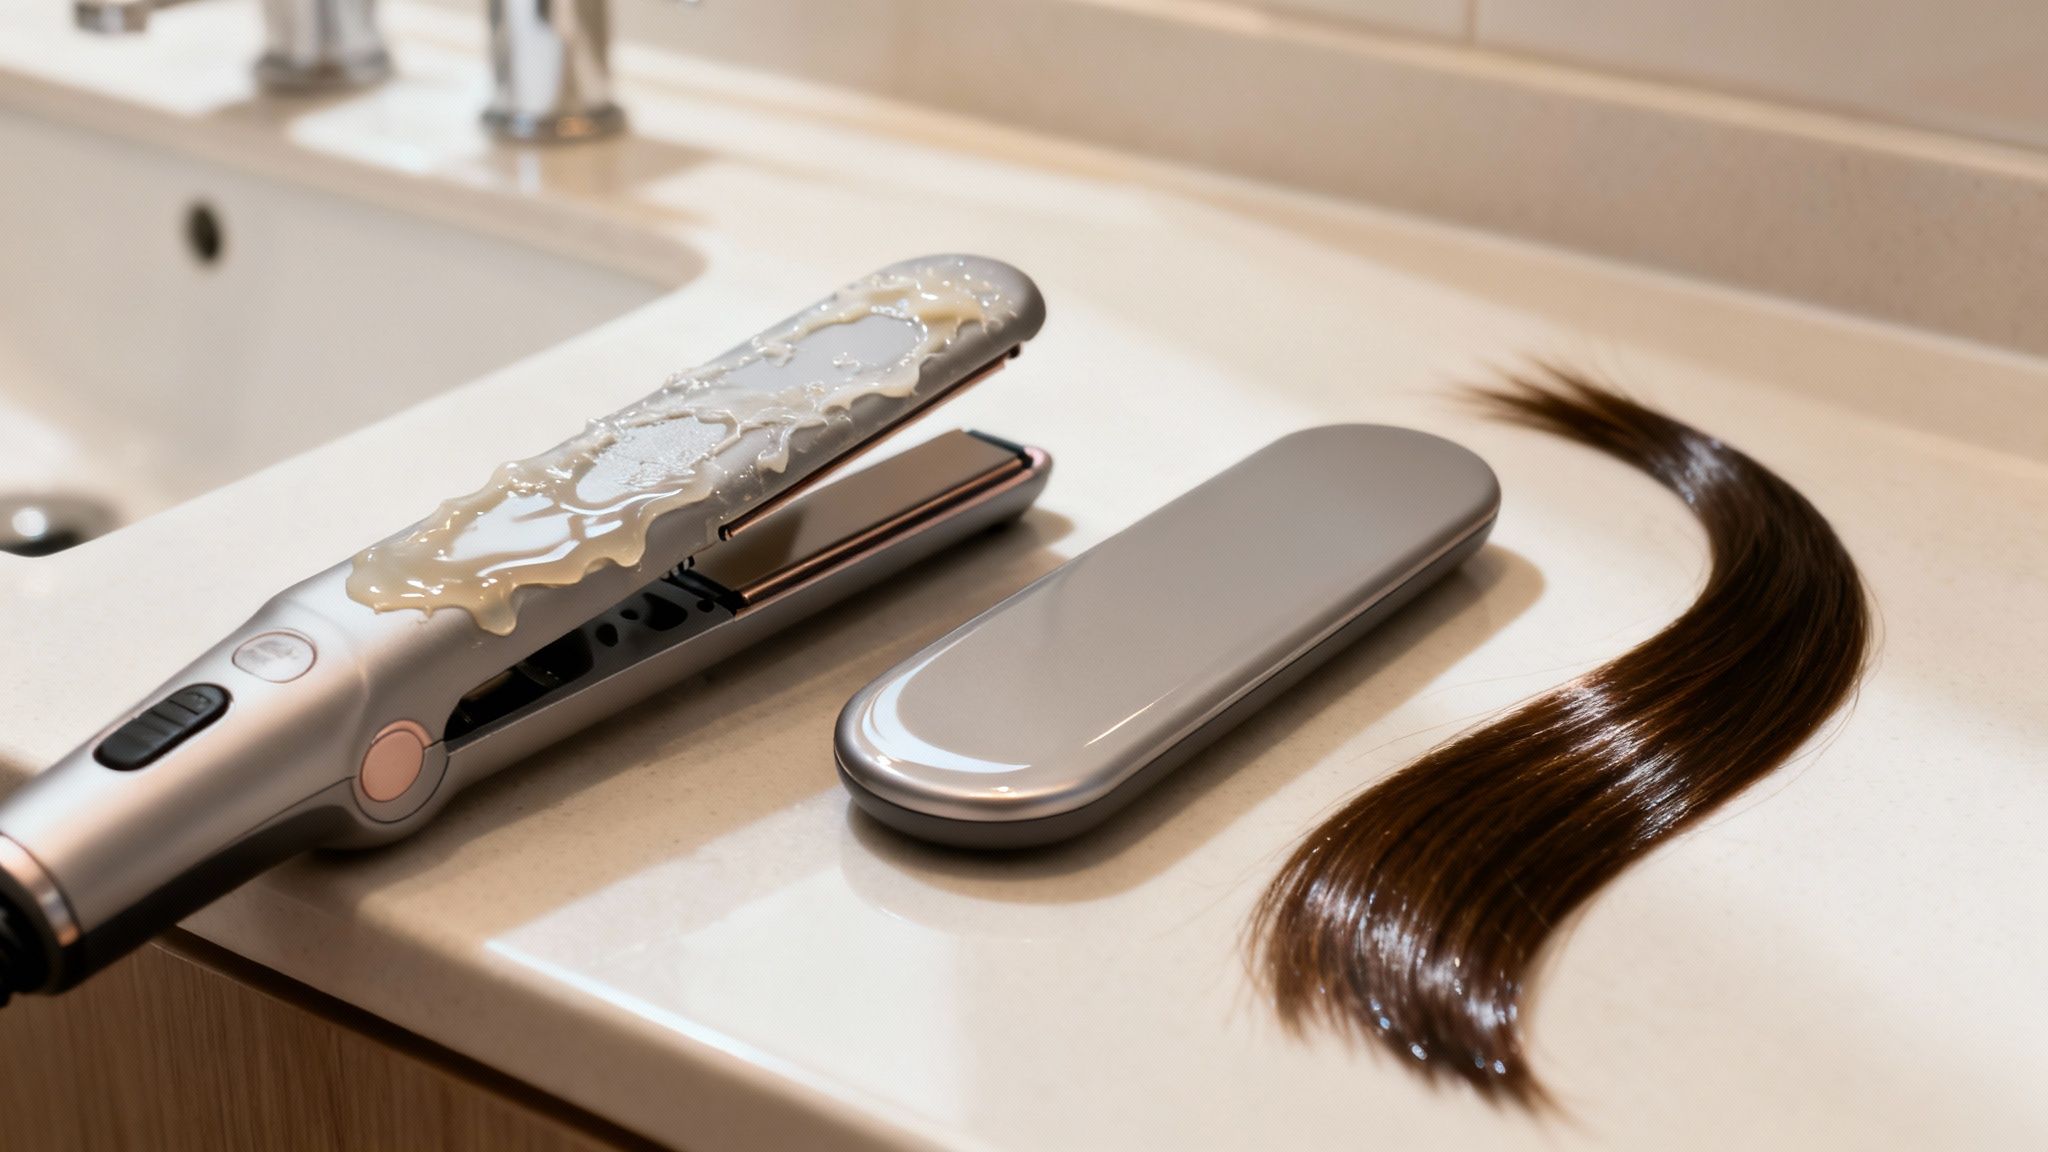
This isn't just about looks—a dirty straightener is a fast track to heat damage. That layer of gunk causes the plates to heat unevenly, creating "hot spots" that scorch your hair. It forces you to make multiple passes over the same section, which means more stress and more potential for breakage.
That sticky residue does more than just make your tool look gross; it actively prevents the plates from gliding smoothly. This friction pulls and snags delicate strands, leading to split ends and a less-than-silky finish. A clean flat iron, on the other hand, moves effortlessly, sealing the hair cuticle for maximum shine with minimal passes.
Keeping your tools in top shape is a non-negotiable part of how to maintain healthy hair while using heat styling tools. Once you understand why you're cleaning your straightener, it stops feeling like a chore and becomes a crucial step for healthier hair and that fresh-from-the-salon look.
This quick comparison shows the real-world effects of regular cleaning on your hair and styling tool.
| Feature | Dirty Straightener (With Buildup) | Clean Straightener (Maintained) |
|---|---|---|
| Hair Glide | Snags, pulls, and causes friction. | Glides smoothly without catching. |
| Heat Distribution | Uneven, with hot spots causing damage. | Consistent, even heat for safe styling. |
| Styling Time | Requires multiple passes, increasing heat exposure. | Efficient styling with fewer passes. |
| Hair Finish | Dull, frizzy, and prone to split ends. | Shiny, smooth, and healthy-looking. |
| Tool Lifespan | Reduced due to residue buildup and heat transfer issues. | Extended, performs optimally for longer. |
The difference is pretty clear. A clean tool is the foundation for a great hair day.
With the hair straightener market projected to hit USD 11.2 billion by 2034, these tools are an investment worth protecting. Industry data reveals that product residue—an issue affecting about 75% of users—can slash heat transfer by up to 30% and cut a tool's lifespan nearly in half.
By simply keeping your straightener clean, you're making sure it works at its best for years to come.
Tool hygiene is a universal principle in beauty. The same logic applies across the board, whether you're learning how to sanitize other crucial beauty tools like makeup brushes or caring for your flat iron. Clean tools deliver better results and are safer to use, period.
Good news—you don’t need a fancy kit or overpriced cleaners to get your straightener looking brand new. Chances are, the best tools for the job are already sitting in your bathroom cabinet. Getting the right supplies together is all about making sure you can melt away that stubborn product buildup without harming your flat iron's delicate plates.
Before you jump in, grab a few simple things. The goal here is to dissolve all that gunk gently, not to scrub it off with brute force. Using anything harsh or abrasive can create tiny scratches on ceramic or titanium plates, which leads to your hair snagging and, even worse, uneven heat spots.
The perfect cleaning setup is simple, cheap, and surprisingly effective. Here’s exactly what you need to get this done right:
I see people make this mistake all the time: reaching for a bottle of Windex or an all-purpose wipe. Don't do it! They often contain ammonia or bleach, which will strip the protective coating right off your straightener's plates and permanently ruin that smooth glide. Stick to the basics.
Knowing what not to use is just as important as knowing what to grab. The wrong item can turn a quick cleaning job into a very expensive mistake.
Make sure you steer clear of these:
Now, for keeping your whole styling area clean, a multi-purpose product is great to have on hand. While you’d never use it on the actual plates, the Morfose Ossion Multi-Purpose Cleaning Spray is perfect for wiping down the handle, cord, and your vanity to keep everything looking pristine.
With these simple supplies in hand, you're all set to bring your flat iron back to life safely.
Ready to get that flat iron looking and performing like it’s brand new again? Let's get down to business. Before you even think about cleaning, the most important rule is safety first. Always, always unplug your straightener and let it cool down completely. Trust me, trying to clean a hot iron is a recipe for disaster.
Once it's cool to the touch, you can start dealing with whatever is gunked up on the plates. The approach you'll take really depends on the mess. A quick daily wipe is one thing, but tackling that stubborn, burnt-on product buildup is another.
Before using any liquids, give the cool plates a quick pass with a dry microfiber cloth. This little habit takes all of five seconds but makes a huge difference in preventing residue from baking on. For light buildup, this might be all you need.
For a really thorough clean that cuts right through that sticky product residue, rubbing alcohol is your best friend. Get yourself a cotton pad or a soft microfiber cloth and dampen it with 70% isopropyl alcohol. The keyword here is damp, not soaking wet—you don't want liquid dripping into the electronics.
Gently but firmly wipe the plates. You’ll probably see the brown gunk start to lift off almost instantly, which is so satisfying. For those tricky spots around the edges of the plates, dip a cotton swab in the alcohol and run it along the grooves. You'd be surprised how much buildup hides in there.

The goal here is to let the alcohol dissolve the grime, not to scrub it off with brute force. Gentle, consistent pressure is far more effective—and safer for your plates—than trying to scrape the residue off.
Not all flat irons are made the same, and the material of your plates definitely matters. Using the right technique for your specific plate type is key to avoiding scratches or damage.
By matching your cleaning method to your straightener, you’ll keep it in top-notch condition for years. And while you're at it, remember that keeping all your beauty tools clean is a game-changer. If you found this useful, we have another great guide on how to clean a hair brush that you’ll probably love.
Sometimes, a quick wipe-down with rubbing alcohol just isn’t going to cut it. We’ve all been there—you look at your flat iron and see that dark, crusty layer of baked-on product and wonder if it’s a lost cause.
It’s not. For those moments when you’re facing some next-level grime, you just need to bring out a few advanced techniques. These methods are designed to dissolve the toughest residue without forcing you to scrub, which could permanently damage your straightener’s plates.
Here’s a trick that seems counterintuitive but works wonders. With your straightener completely unplugged, let it cool down until it's just barely warm. If it’s already cold, plug it in for only 10-15 seconds and then immediately unplug it again. You’re aiming for gentle warmth, not styling heat.
This tiny bit of heat softens the hardened, baked-on gunk, making it much easier to lift off. Once it's warm, grab your alcohol-dampened microfiber cloth and gently wipe the plates. You’ll be shocked at how easily the residue starts to slide away.
This method is surprisingly effective. In fact, some pros will heat a straightener to around 150°F for 30 seconds to loosen grime before wiping, a trick that can safely remove up to 95% of residue.
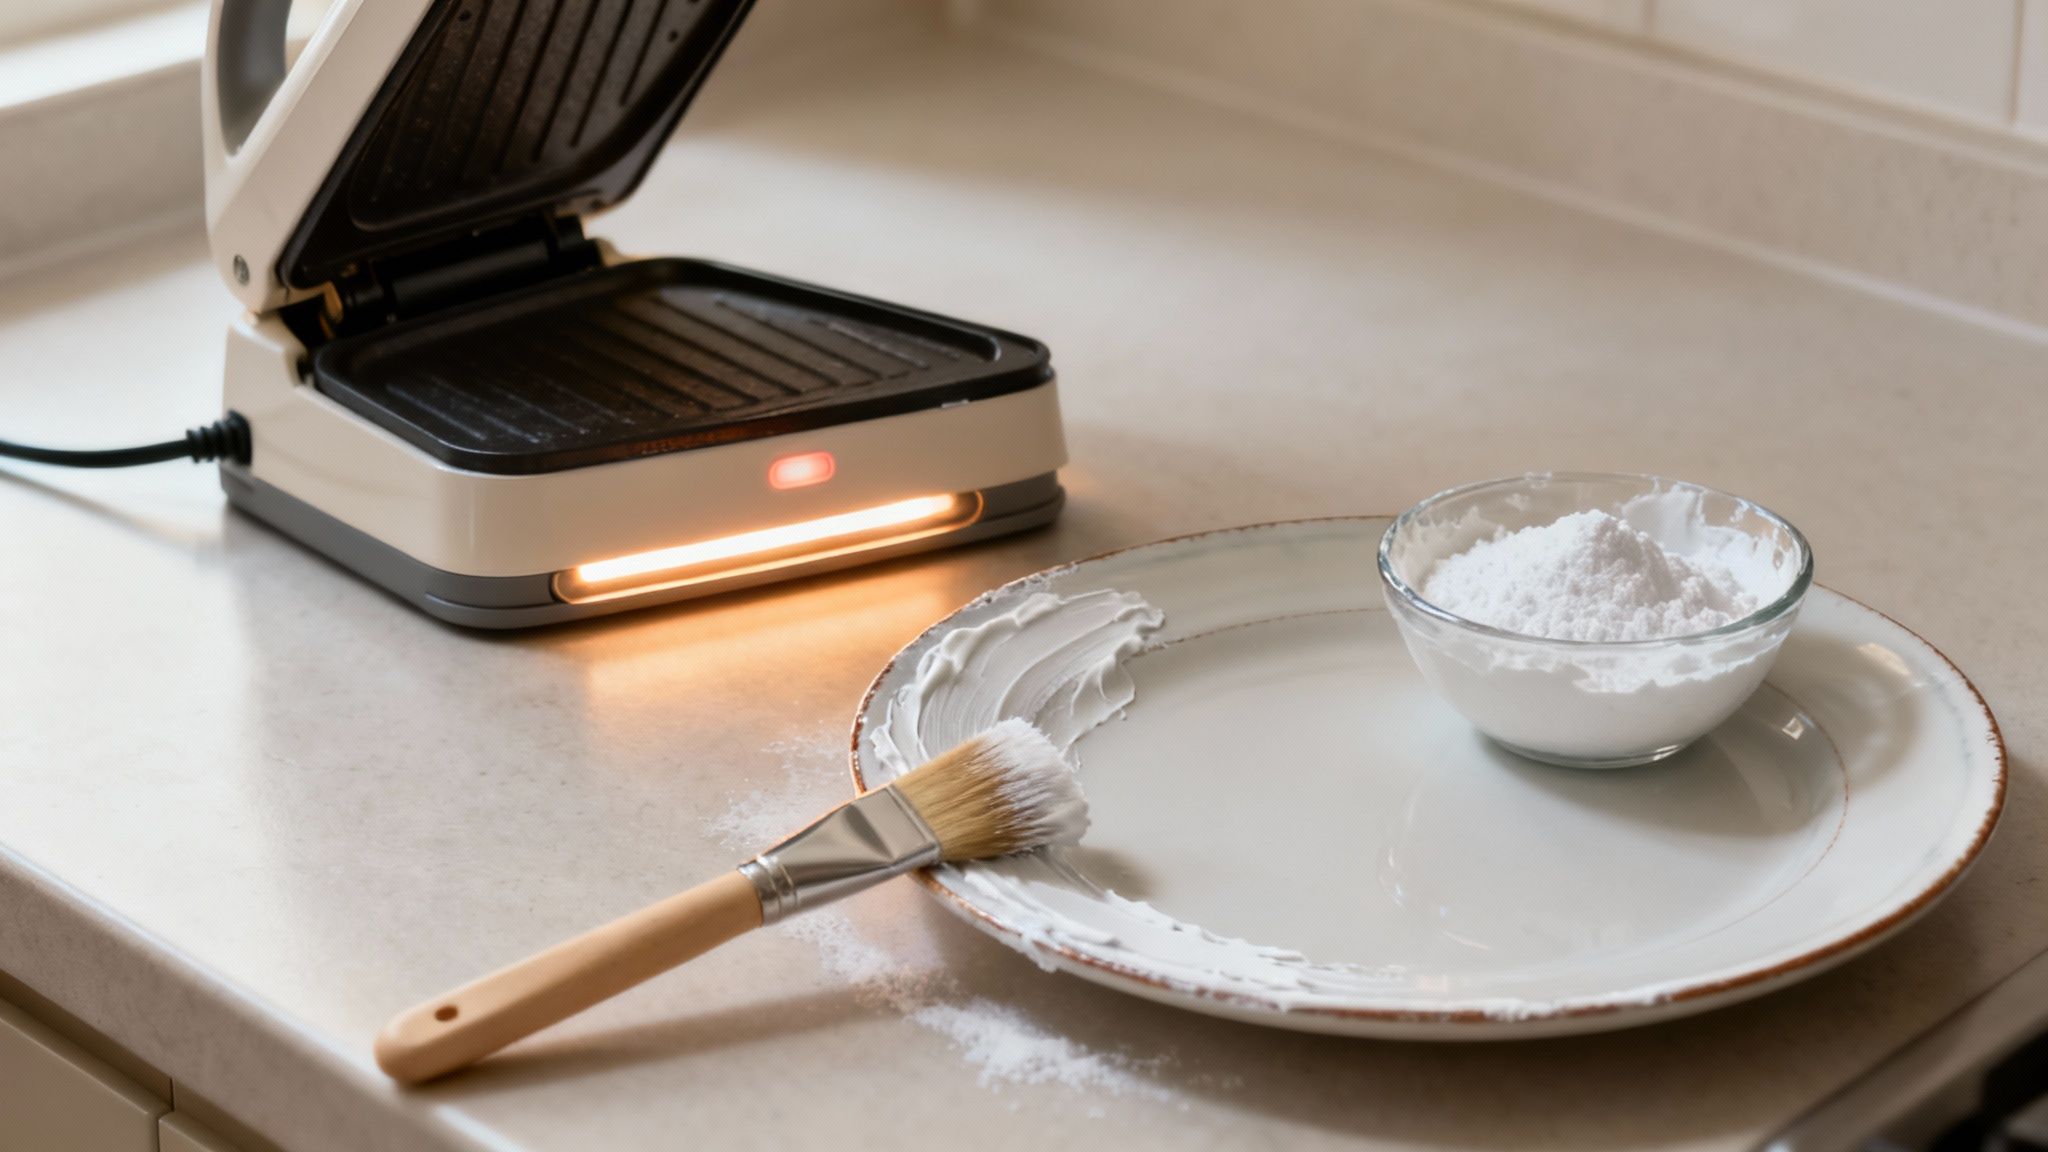
When heat alone isn’t enough, a carefully made baking soda paste can be your secret weapon against the most resilient buildup. Getting the texture right is the key to avoiding scratches, especially on more delicate ceramic plates.
Here’s how to do it safely:
Tackling stubborn baked-on grime is all about using the right technique for the material. For a deeper dive into safe and effective cleaning, this expert guide on removing stubborn stains from various surfaces is a fantastic resource.
And of course, preventing the gunk in the first place is always the best strategy. Understanding what’s in your products, like we discuss in our article about the benefits of citric acid on hair, can help you choose formulas less likely to cause heavy buildup.
Honestly, the easiest way to deal with a gunky flat iron is to stop the mess from ever happening. That stubborn, baked-on film you’re scrubbing off? It almost always comes from the styling products you use before the heat hits your hair. Picking the right formulas can be a total game-changer, drastically cutting down how often you need to do a full-on deep clean.
Many stylers are loaded with heavy silicones or sticky polymers that basically caramelize the second they touch those hot ceramic plates. They might do an okay job protecting your hair, but they leave behind a nasty residue that just keeps building up. The secret is finding products that protect your hair without leaving all that gunk behind.
This is where being selective about your products really pays off. Morfose formulas are designed with a dual purpose: protect your hair’s health and maintain your styling tools. We focus on creating lightweight, effective products that deliver critical heat protection without the ingredients that cause that notorious sticky buildup.
A perfect example is the Morfose Ossion Amino Keratin Hair Care Oil. It’s an ideal pre-styling treatment that nourishes strands and shields them from heat damage, but it absorbs cleanly and leaves virtually no residue on your plates. Its non-greasy finish helps your straightener glide through your hair, which gives you a smoother style and keeps the plates looking new for much longer.
Choosing a heat protectant that doesn't cook onto your flat iron is a game-changer. It transforms cleaning from a frustrating scrubbing session into a simple, quick wipe-down.
When you invest in high-quality styling products, you're doing more than just caring for your hair—you're also protecting the lifespan of your tools. If you style your hair often, take a look at our complete line of heat protection sprays to find the perfect lightweight match for your routine. Using the right stuff means less time cleaning and more time loving your flawless, healthy hair.
Even when you've got the basics down, a few questions about cleaning your hair straightener can pop up. Getting the details right is about more than just keeping your tool in top shape—it’s about protecting your hair. So, to make sure you’re completely confident, we’ve rounded up the most common questions and are giving you clear, direct answers.
Think of this as your go-to guide for flat iron maintenance. We're cutting through the confusion to help you sidestep common mistakes and keep your styling routine safe and effective.
The perfect cleaning schedule really comes down to how often you style and what kind of products you’re using. The goal is to stay consistent to prevent that tough, baked-on gunk that’s a nightmare to remove.
For the best results, try to follow this simple timeline:
Your flat iron will let you know when it needs some TLC. If you see any visible buildup, feel the plates snagging your hair, or smell a faint burnt odor, it’s definitely time for a thorough cleaning.
This is a really common question, but the answer is a hard no. Keep those magic erasers far, far away from your straightener. While they might feel soft, they’re actually a micro-abrasive material, almost like an incredibly fine sandpaper.
Using one on your plates will etch thousands of tiny, invisible scratches into the surface. These scratches will snag and break your hair, cause uneven heating, and wear down the protective coating on your plates much faster. Always stick with soft, non-abrasive materials like microfiber cloths to keep your tool working like new.
It’s not just the plates that get dirty. Product overspray, fingerprints, and dust can make the outside of your straightener look just as grimy. Keeping the handle and casing clean is easy and makes your whole tool feel fresh.
First, make sure the straightener is cool and completely unplugged. Lightly dampen a soft microfiber cloth with a bit of rubbing alcohol or a gentle all-purpose cleaner. Wring it out well—you don't want it dripping wet.
Then, just wipe down the plastic casing, handle, and even the cord to lift off any residue. If you need to get into tight spaces around buttons, hinges, or the digital display, a cotton swab dipped in alcohol works perfectly without risking moisture damage. And remember, never spray any cleaner directly onto the tool.
You need to be extremely careful when bringing water into the mix. It might seem harmless, but water and electronics are a recipe for disaster and can cause a fatal short circuit.
You should absolutely never submerge your flat iron or run it under a tap. If you must use water—say, to remove a DIY baking soda paste—only use a cloth that has been dampened and then wrung out completely. Follow up immediately by drying the area thoroughly with a separate dry cloth.
Honestly, isopropyl alcohol is a much safer and more effective bet. It powerfully cuts through product buildup and evaporates almost instantly, which minimizes the risk of any moisture seeping into the tool's internal wiring.
At Morfose, we know that gorgeous, healthy hair starts with smart habits and high-quality care. A clean straightener is your first step toward getting that flawless style without compromising your hair's integrity. To protect your strands from heat and prevent future buildup, check out our complete collection.
Discover the perfect Morfose styling products for your routine at themorfose.com
