
How to Curl Hair With a Flat Iron for Effortless Waves
Learning how to curl hair with a flat iron is a complete game-changer. It instantly turns one styling tool into a multi-purpose powerhouse, and it's the secret to getting those effortless, salon-quality waves at home. While it might sound odd to use a straightener for waves, this method gives you incredible control for creating everything from loose beachy styles to tighter curls.
This guide will walk you through the entire process, from choosing the right tool and prepping your hair to mastering the essential techniques. With a few simple steps, you can achieve gorgeous, long-lasting flat iron curls and waves.
Why a Flat Iron Is Your Secret Curling Weapon

It sounds a little strange to use a straightener for curling, but your trusty flat iron is one of the most versatile tools in your arsenal. Unlike a traditional curling wand that often produces the same uniform spiral over and over, a flat iron gives you incredible control over the shape and texture of your curls. You can create everything from tight, bouncy ringlets to loose, beachy waves just by slightly changing your technique.
This is exactly why so many stylists—and people styling at home—swear by this method. You get so much more bang for your buck, using one tool for multiple looks and saving both money and precious counter space. While a flat iron is made for straightening, learning to curl with it unlocks a whole new level of styling potential.
If you're looking to master smooth styles first, we have a whole guide dedicated to achieving a sleek look with professional hair straightening.
Choosing the Right Tool
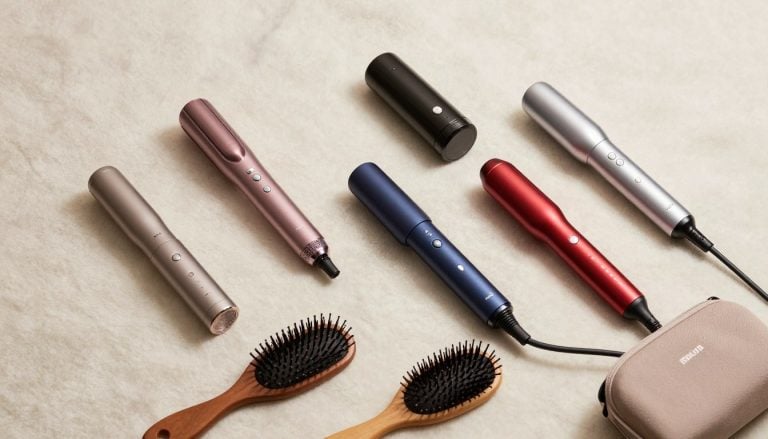
The key to getting flawless flat iron curls is starting with the right kind of straightener. You absolutely need one with rounded or beveled plate edges. This specific shape is what allows the hair to glide smoothly through the iron without creating awkward dents or creases in your curls.
When you're shopping for a new tool, it can be helpful to check out roundups of the best portable hair straighteners, which often have the features you need plus the convenience of being travel-friendly.
Your Essential Toolkit
Before you even plug in your iron, it pays to get everything you need in one place. Being prepared makes the whole process smoother and helps you get pro-level results. Here's a quick checklist of the essentials.
| Item | Purpose |
|---|---|
| Flat Iron | Your main styling tool. A 1 to 1.5-inch barrel with rounded edges is perfect for most styles. |
| Heat Protectant | This is completely non-negotiable. It's your first line of defense against heat damage. |
| Hair Clips | Absolutely essential for sectioning your hair. It makes the whole process so much more manageable. |
| Hairspray | Use this at the end to set your beautiful curls and give them long-lasting hold. |
Setting the Stage for Flawless Curls

Ever wonder how stylists get those perfect, bouncy curls that seem to last for days? The real magic happens long before the flat iron even heats up. Getting your hair prepped the right way is what separates healthy, defined waves from a frizzy, damaged mess.
Think of it like this: you wouldn't paint on a dirty canvas. The same goes for your hair. You need a clean, protected, and smooth surface to create a masterpiece. First things first, and this is a big one: always start with 100% dry hair. If you hear any sizzling when the iron touches your hair, stop immediately. That sound is water boiling inside your hair strands, causing steam damage that leads to breakage.
Step 1: Protect and Detangle Your Hair
Once your hair is completely dry, it's time for your most important tool: a great heat protectant. If you take away only one tip today, let it be this: never, ever skip this step. A quality spray creates a protective shield around each strand, locking in moisture and defending against the high heat of your styler.
Lift your hair in sections and mist evenly from the roots all the way to the ends to make sure every single strand is coated. Follow up by gently brushing through with a detangling brush to spread the product and get rid of any knots. This is key for letting the flat iron glide through without snagging.
Step 2: Section for Success
Okay, your hair is protected and tangle-free. Now for the step that most people skip but truly makes all the difference: sectioning. It might feel tedious, but trust me, it’s the secret to getting consistent, professional-looking curls instead of a lopsided, uneven style.
Use clips to divide your hair into at least four main quadrants—two in the front, two in the back. From there, you’ll work with much smaller pieces, about 1- to 1.5-inches wide. This precision guarantees the heat hits every piece of hair evenly for uniform curls all the way around.
The impact of heat styling is no joke. Studies have found that improper technique can be responsible for 60% of heat-related breakage. The good news? Using a keratin-infused heat protectant can slash that damage by up to 50%. We're also seeing huge growth in smarter beauty tools; SharkNinja’s beauty division, for example, saw sales soar 33.2% to $1.43 billion in 2026, driven by a demand for tools with more personalized and safer temperature settings.
Mastering the Essential Flat Iron Curling Techniques
Alright, with your hair prepped and protected, it's time for the fun part. Learning how to curl hair with a flat iron is really about getting a feel for a few key motions. Once you get the hang of these, you can create just about any look you want, from sleek, polished curls to those perfectly undone waves.
There’s a reason these techniques are so popular—they just work. The flat iron has become a go-to tool for so many people. In fact, 80% of women aged 18-34 own one, and its popularity has been supercharged by billions of views on platforms like YouTube and Instagram. This shows just how versatile these tools are for everyday styling. You can find more global hair tool market insights on ResearchAndMarkets.com if you're curious about the trends.
The Classic Twist and Glide for Everyday Waves
This is the first technique everyone should master. It's the secret to creating soft, natural-looking waves that look polished yet effortless. It's the perfect go-to for a quick, put-together style.
- Take a one-inch section of hair and clamp your flat iron around it mid-shaft, a few inches down from your roots.
- As you start pulling the iron down toward the ends, rotate it 180 degrees (a half-turn) away from your face. The angle here is important: holding the iron more horizontally will give you a looser wave, while a more vertical hold creates a tighter curl.
- Now, just glide the iron smoothly all the way down to the ends, keeping a gentle but consistent tension. A slower pass gives you a more defined curl, while a faster glide results in a soft, relaxed wave. For a more modern, undone look, try leaving the last inch of your hair straight.
Creating Trendy S-Waves
If you're after that coveted beachy, textured look, the S-wave is your best friend. Instead of making a spiral curl, this method creates a back-and-forth "S" pattern down the hair.
- Start by clamping a section of hair near the root.
- Bend your wrist to create the first curve of the "S," then unclamp and release.
- Move the iron a little further down that same section and bend your wrist in the opposite direction for the next curve.
- Continue this alternating motion all the way down to the ends. It takes a little practice to find your rhythm, but the result is that perfectly imperfect texture you see all over your social media feeds.
Pro Tip: For a more natural and voluminous look, alternate the direction of your curls. Curl one section away from your face, then the next section toward your face. This simple trick prevents the curls from clumping together and adds beautiful dimension and movement.
Achieving Tighter, Bouncier Curls
Want more definition and spring in your curls? The secret is in making a few small adjustments to your technique, specifically your section size and how much you rotate the iron.
- Use Smaller Sections: Instead of a full inch, work with sections that are about a half-inch wide. This helps create a much tighter curl.
- Do a Full Rotation: After clamping the hair, rotate the flat iron a full 360 degrees instead of just a half-turn.
- Glide Slowly: Move the iron down the hair shaft at a slower, more deliberate pace. This gives the hair more time with the heat to really lock in that tight curl pattern.
This method is fantastic for creating major volume and bounce, especially if you have long hair. If you're looking for more ways to switch up your look, you might love our guide on how to style long hair.
Best Morfose Products for Perfect Flat Iron Curls

While your technique is a huge part of learning how to curl hair with a flat iron, the products you choose can take your style from just okay to absolutely incredible. The right formulas are your secret weapon—they protect your strands, boost shine, fight off frizz, and make sure those curls don't quit. Think of Morfose as your complete toolkit to prep, style, and set your look for healthier, more beautiful results.
Prepare and Protect With a Leave-In Conditioner
Industry reports show that up to 70% of hair damage comes from misusing heat tools. Pairing your flat iron with the right protective product is a game-changer. The Morfose Milk Therapy Two Phase Conditioner is packed with milk proteins and 12 amino acids that seal in moisture and can slash potential heat damage by up to 40%. You can explore more about curling iron market trends and consumer habits to see why protection is so key.
Simply spritz the conditioner on dry, sectioned hair before curling. It detangles, nourishes, and creates the perfect protected foundation for styling.
Using the right products transforms the curling process. It’s not just about the final look; it’s about maintaining the health and integrity of your hair through every step, ensuring your curls are as strong as they are stunning.
Add Shine and Fight Frizz With Hair Serum
After your hair is prepped and sectioned, bring in extra nourishment to tame frizz—a must if your hair is naturally dry, coarse, or prone to flyaways.
Working a tiny drop of the Morfose Argan Hair Serum through your mid-lengths and ends before you start curling is a pro move. It instantly smooths the hair cuticle, giving you that high-gloss finish while stopping frizz before it can even start. If you want to learn more about taming unruly hair, our guide on how Morfose's anti-frizz serum works to restore shine is a great read.
Lock in Your Look With Flexible Hold Hairspray
You’ve spent all this time perfecting your curls—the last thing you want is for them to go limp in an hour. The trick is finding a hairspray that delivers serious hold without making your hair feel stiff or crunchy.
- Product: Morfose Ultra Strong Hair Spray
- Application: Hold the can about 10-12 inches from your hair and give it a light, even mist all over.
- Benefit: This spray locks your style in place but still allows for that gorgeous, natural bounce and movement you want.
This final step is your insurance policy, making sure all your hard work pays off with a style that lasts all day.
Troubleshooting Common Curling Frustrations

Even after you think you’ve nailed the basics of curling your hair with a flat iron, you might hit a few roadblocks. From picture-perfect curls that go limp in an hour to stubborn clamp marks, these frustrations can stand between you and a great hair day.
The good news? They're all totally fixable with a few pro tricks. Don’t get discouraged if your first tries aren't runway-ready. Learning any new styling technique takes practice, and figuring out what works for your hair is part of the journey.
Why Your Curls Are Falling Flat
This is probably the number one complaint. You put in all that effort to create gorgeous waves, and before you've even left the house, they've vanished. There are a couple of usual suspects behind this disappearing act.
First, your hair might be too clean and silky. Freshly washed hair often lacks the grit and texture needed for a curl to hold its shape. Try styling on second-day hair, or give it a little help with a light-hold mousse or a texturizing spray before you start.
Pro Tip: Let every single curl cool down completely before you touch it. When a curl comes off the iron, gently cup it in your palm for a few seconds or even pin it to your scalp with a small clip. This "setting" process helps the hair cuticle lock into its new coiled shape, making your curls last so much longer.
How to Avoid Dents and Clamp Marks
Nothing ruins a soft, beautiful curl faster than a harsh, angular line from your flat iron. These dreaded dents usually happen because your iron has sharp edges, or you’re hesitating and pausing in one spot for too long.
To avoid this, make sure your flat iron has rounded or beveled edges. Most importantly, keep the iron moving. It should be one constant, fluid motion from the moment you clamp down near the root until you release the ends. If you stop, you're pretty much guaranteed to create a crease.
- Maintain Consistent Speed: Glide the iron down the hair shaft at a steady, even pace. No stopping.
- Keep a Light Grip: You don't need to squeeze the life out of the plates. A firm but gentle pressure is all it takes.
For anyone who feels like their curls just won't hold, our in-depth article on why your curls don't last dives even deeper with advanced solutions.
Getting the Best Results for Your Hair Type
Not all hair is created equal, and your unique texture plays a huge role in how your curls turn out. Fine hair often struggles to hold a style, while thick or coarse hair can be resistant to curling.
- For Fine Hair: Stick with smaller 1-inch sections and a lower heat setting to avoid damage.
- For Thick/Coarse Hair: You can bump up the temperature a bit and use smaller sections to make sure the heat penetrates every strand evenly.
Market data shows that 85% of users get professional-looking curls that hold for up to 48 hours by sectioning hair into 1.5-inch pieces, using a temperature between 320-380°F depending on hair type, and gliding the iron with a 45-degree twist. With hairstyle videos getting over 2.4 billion engagements recently, it's clear people are figuring out these methods at home. You can discover more about the growing curling iron market on FortuneBusinessInsights.com.
Frequently Asked Questions About Flat Iron Curls
Even with the best tutorial, learning a new styling technique always comes with questions. It’s totally normal! Mastering flat iron curls takes a bit of practice, so let's clear up some of the most common things people wonder about.
Will a Flat Iron Damage My Hair?
Any time you put hot tools on your hair, there's a risk of damage. But using a flat iron isn't automatically worse than a curling wand, especially if you play it smart. A heat protectant is your non-negotiable first step—it creates a crucial shield between the hot plates and your hair. From there, always start with the lowest temperature setting that works for your hair type. And a golden rule: never use a hot iron on damp hair. Make sure it's 100% dry to prevent steam damage that leads to breakage.
What’s the Best Kind of Flat Iron for Curling?
Not all straighteners are great for curling. To get smooth, beautiful curls, you need a tool with a couple of key features.
The sweet spot is a flat iron that is 1 to 1.5 inches wide and has beveled or rounded edges. That curved shape helps your hair glide smoothly around the barrel, giving you a perfect curl without any weird dents or creases.
Plates made from ceramic, tourmaline, or titanium are also your best bet. They’re fantastic at distributing heat evenly, which gets rid of "hot spots" that can scorch your hair and ensures a safer, more consistent result.
Why Won’t My Hair Hold a Curl From a Flat Iron?
It’s one of the most common frustrations: you create perfect curls, only for them to fall flat in an hour. This is almost always a fixable problem. Often, the issue is that your hair is too clean and lacks the grit needed for a style to last. Try curling on second-day hair or use a texturizing spray first. Another culprit could be using sections that are too large. Finally, and this is a big one, you have to let each curl cool down completely before you touch it. That cooling-down period is what sets the curl for the long haul.
Is It Better to Use a Flat Iron or a Curling Wand?
So, which tool is "better"? It really just depends on the kind of curl you’re going for. A classic curling wand is perfect if you want uniform, bouncy spiral curls every time. A flat iron, however, is arguably the more versatile tool. It opens up a world of possibilities, from tight ringlets and loose beachy waves to effortlessly chic "S-waves." Many people find that once they get the hang of it, their flat iron is the only hot tool they ever reach for.
With the e-commerce market booming—online sales jumped 33% year-over-year in 2024—it's never been easier to find the perfect dual-voltage flat iron with key safety features like auto-shutoff. As you can see from market research on curling irons, today's shoppers are looking for both convenience and peace of mind.
Your Go-To Guide for Perfect Curls
Learning how to curl hair with a flat iron is a skill that will serve you well, saving you time and money by making one tool do the work of two. The key to success is preparation: start with dry, protected hair, use a flat iron with rounded edges, and master the twist-and-glide motion. Don't forget to let your curls cool completely to lock them in place. With a little practice and the right products, you'll be creating beautiful, long-lasting waves like a pro.
At Morfose, we know that having the right products is just as important as having the right technique. To keep your strands protected and give your flat iron curls incredible hold, check out our collection of heat protectants and styling sprays at https://themorfose.com.